Step 1
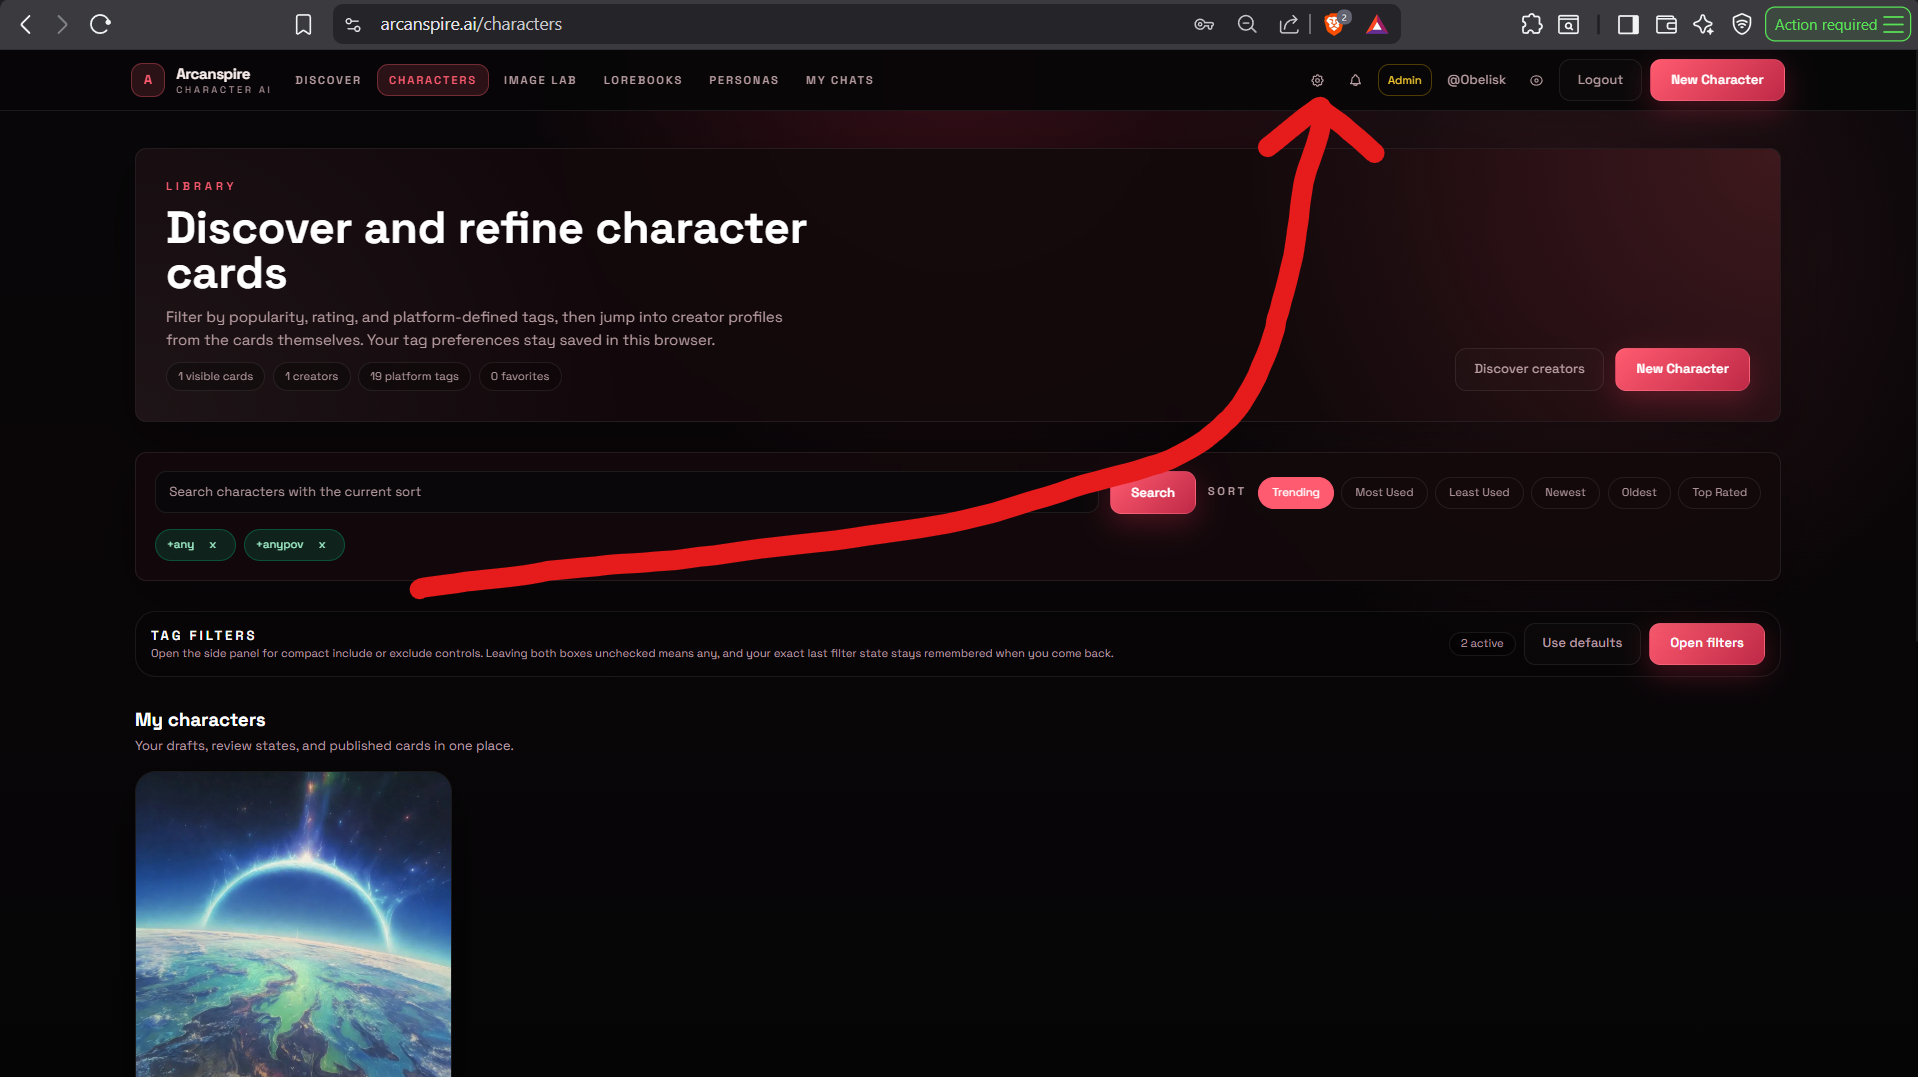
Open Arcanspire settings from the chat or character browse screen
Use the gear icon in the top navigation. In your screenshots, this is the first click before anything else.

This walkthrough follows the click order from your reference screenshots and turns it into a clean, repeatable setup path. Choose either OpenRouter or Nvidia NIM, copy the exact API key and model ID, then save them in Arcanspire.
Also note that I vibecoded the shit out of this section. It's so overkill lol.
1. Open the gear
All provider setup starts in the Arcanspire settings modal.
2. Copy the exact model string
Do not guess the model name from memory or shorten it.
3. Save once
Keys stay on the account, so users only need to do this once per provider.
Best quick-start path if the user wants the fastest free setup. The screenshots show the key creation flow plus how to search for a free model and copy its exact model ID.
Get one free ->Good for users following Nvidia Build's free endpoint flow. The screenshots show the profile menu path, API key generation, free-endpoint filtering, and the View Code model copy step.
Get key at build.nvidia.com ->OpenRouter Walkthrough
Step 1
Use the gear icon in the top navigation. In your screenshots, this is the first click before anything else.

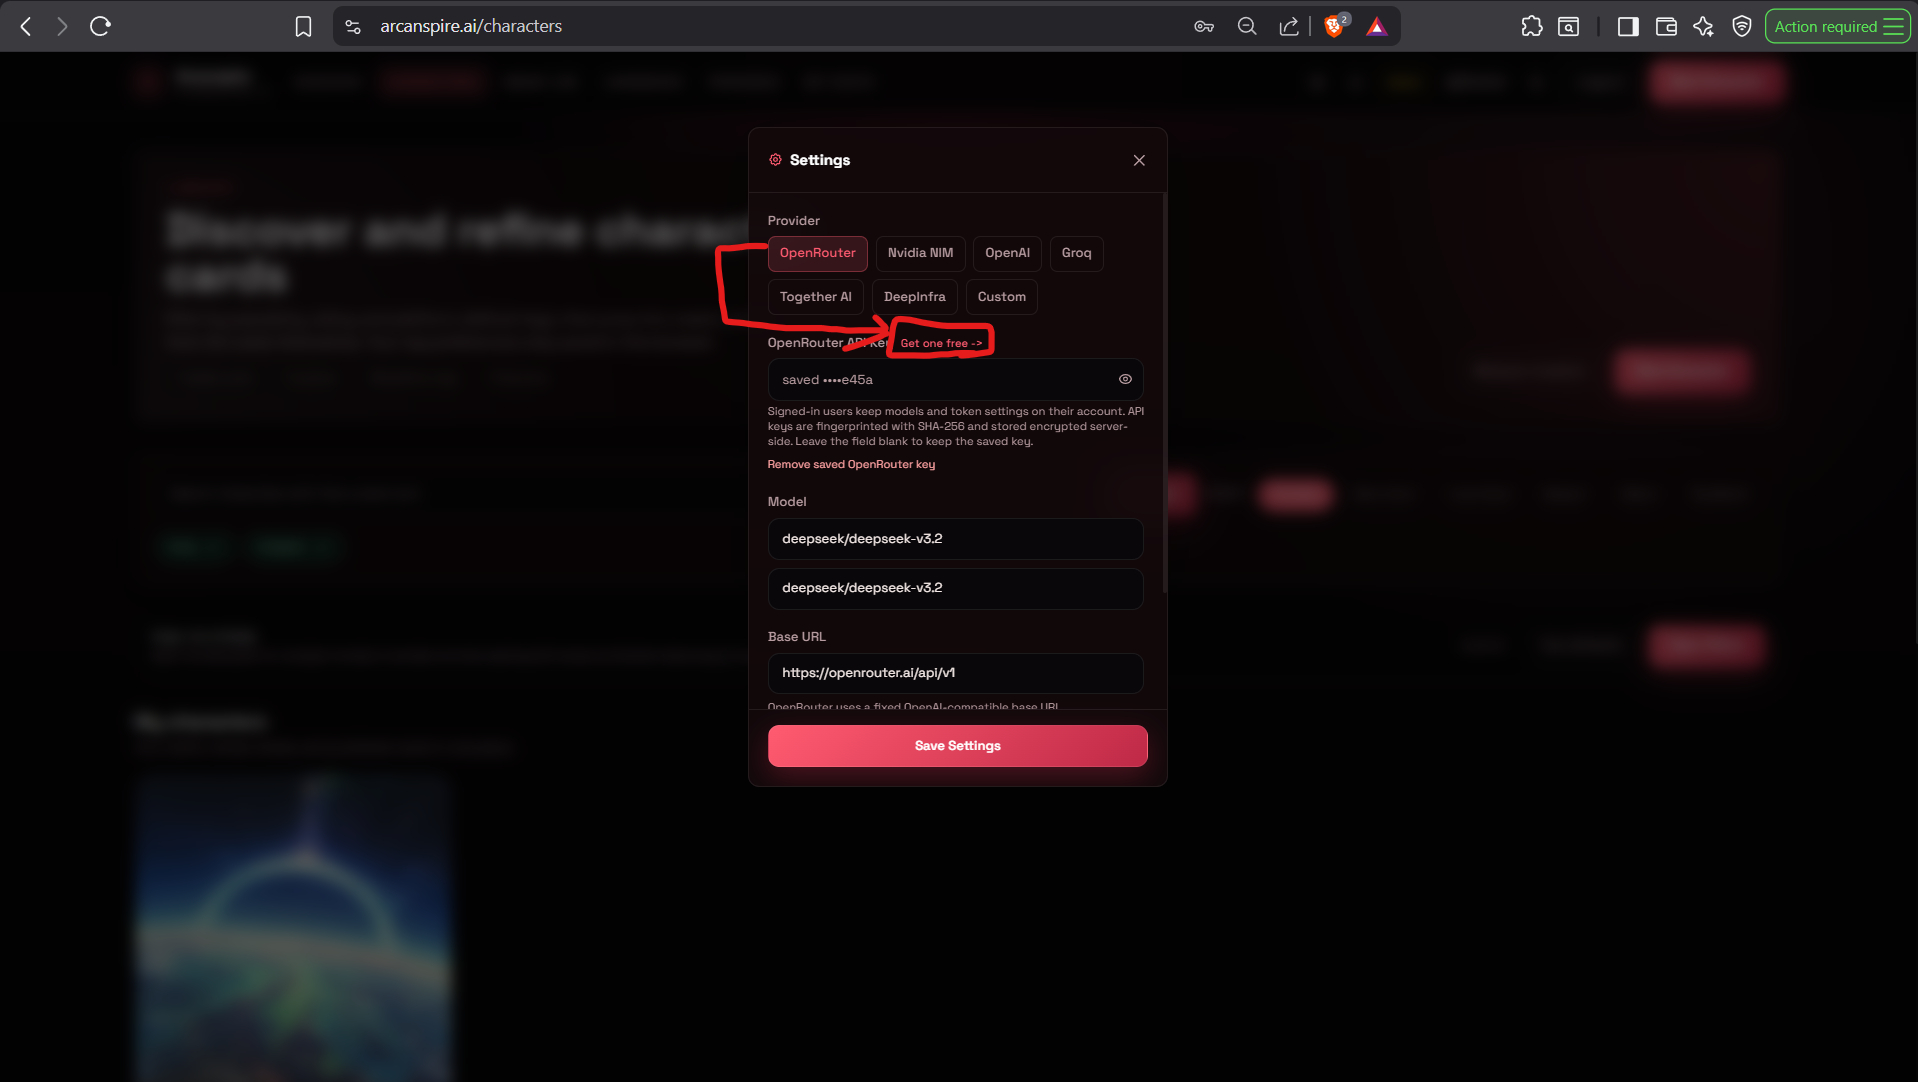
Step 2
OpenRouter is the simplest free route in your screenshots. Start by selecting the OpenRouter tab in Arcanspire and using the highlighted link beside the API key field.

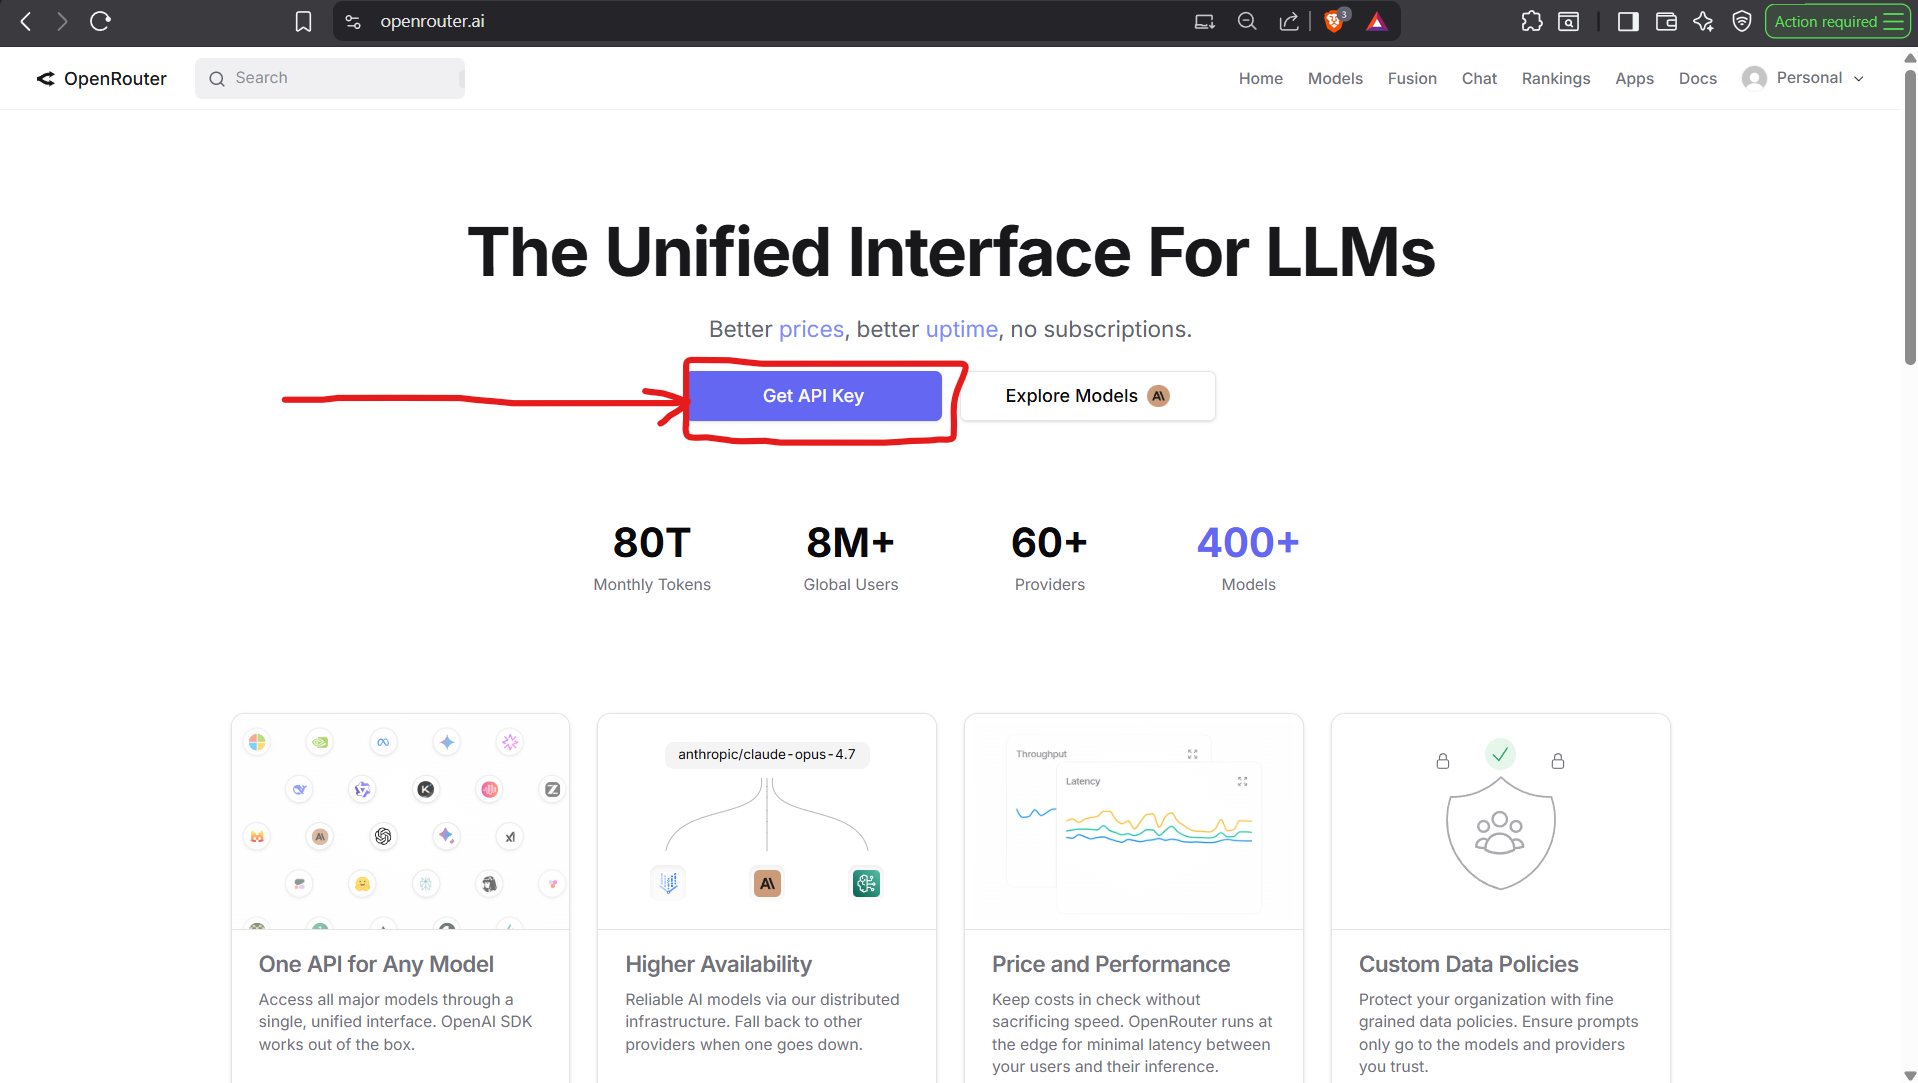
Step 3
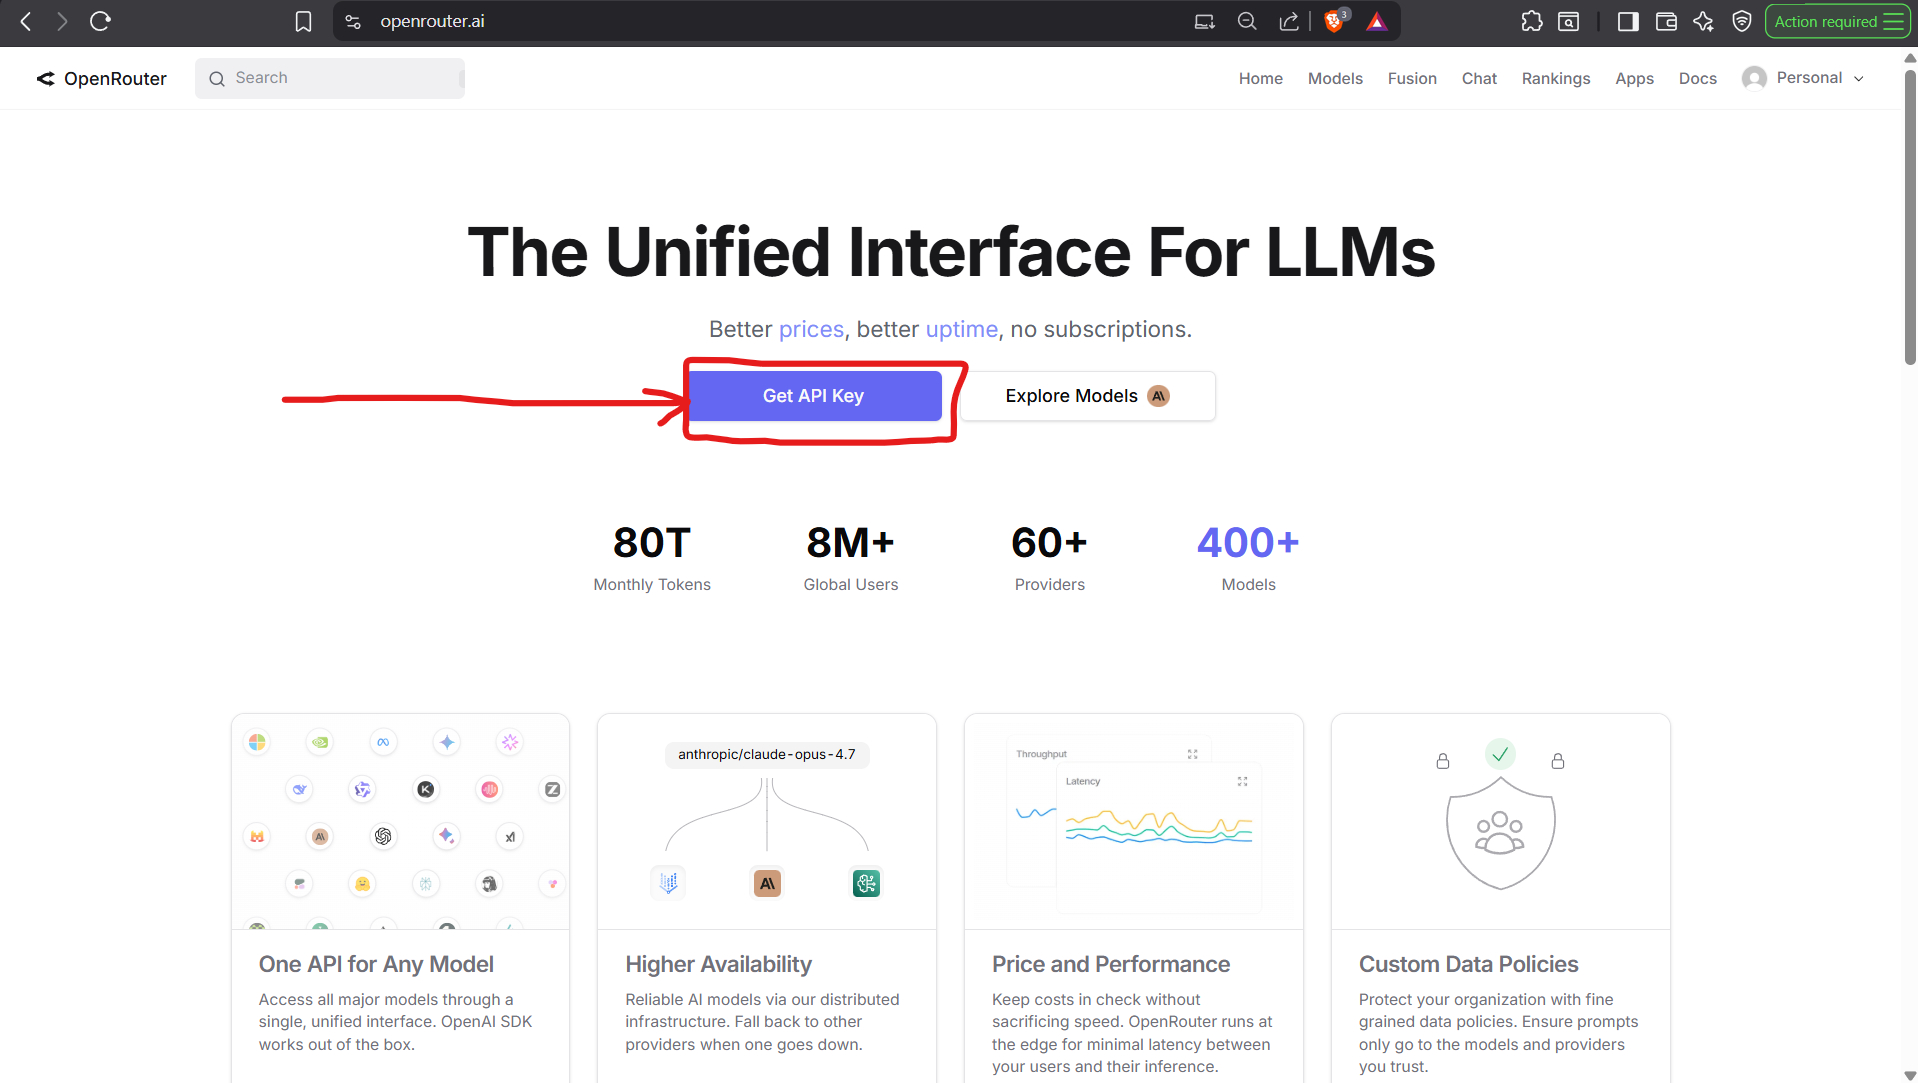
The first OpenRouter screen to use is the landing page button that opens the API key flow.

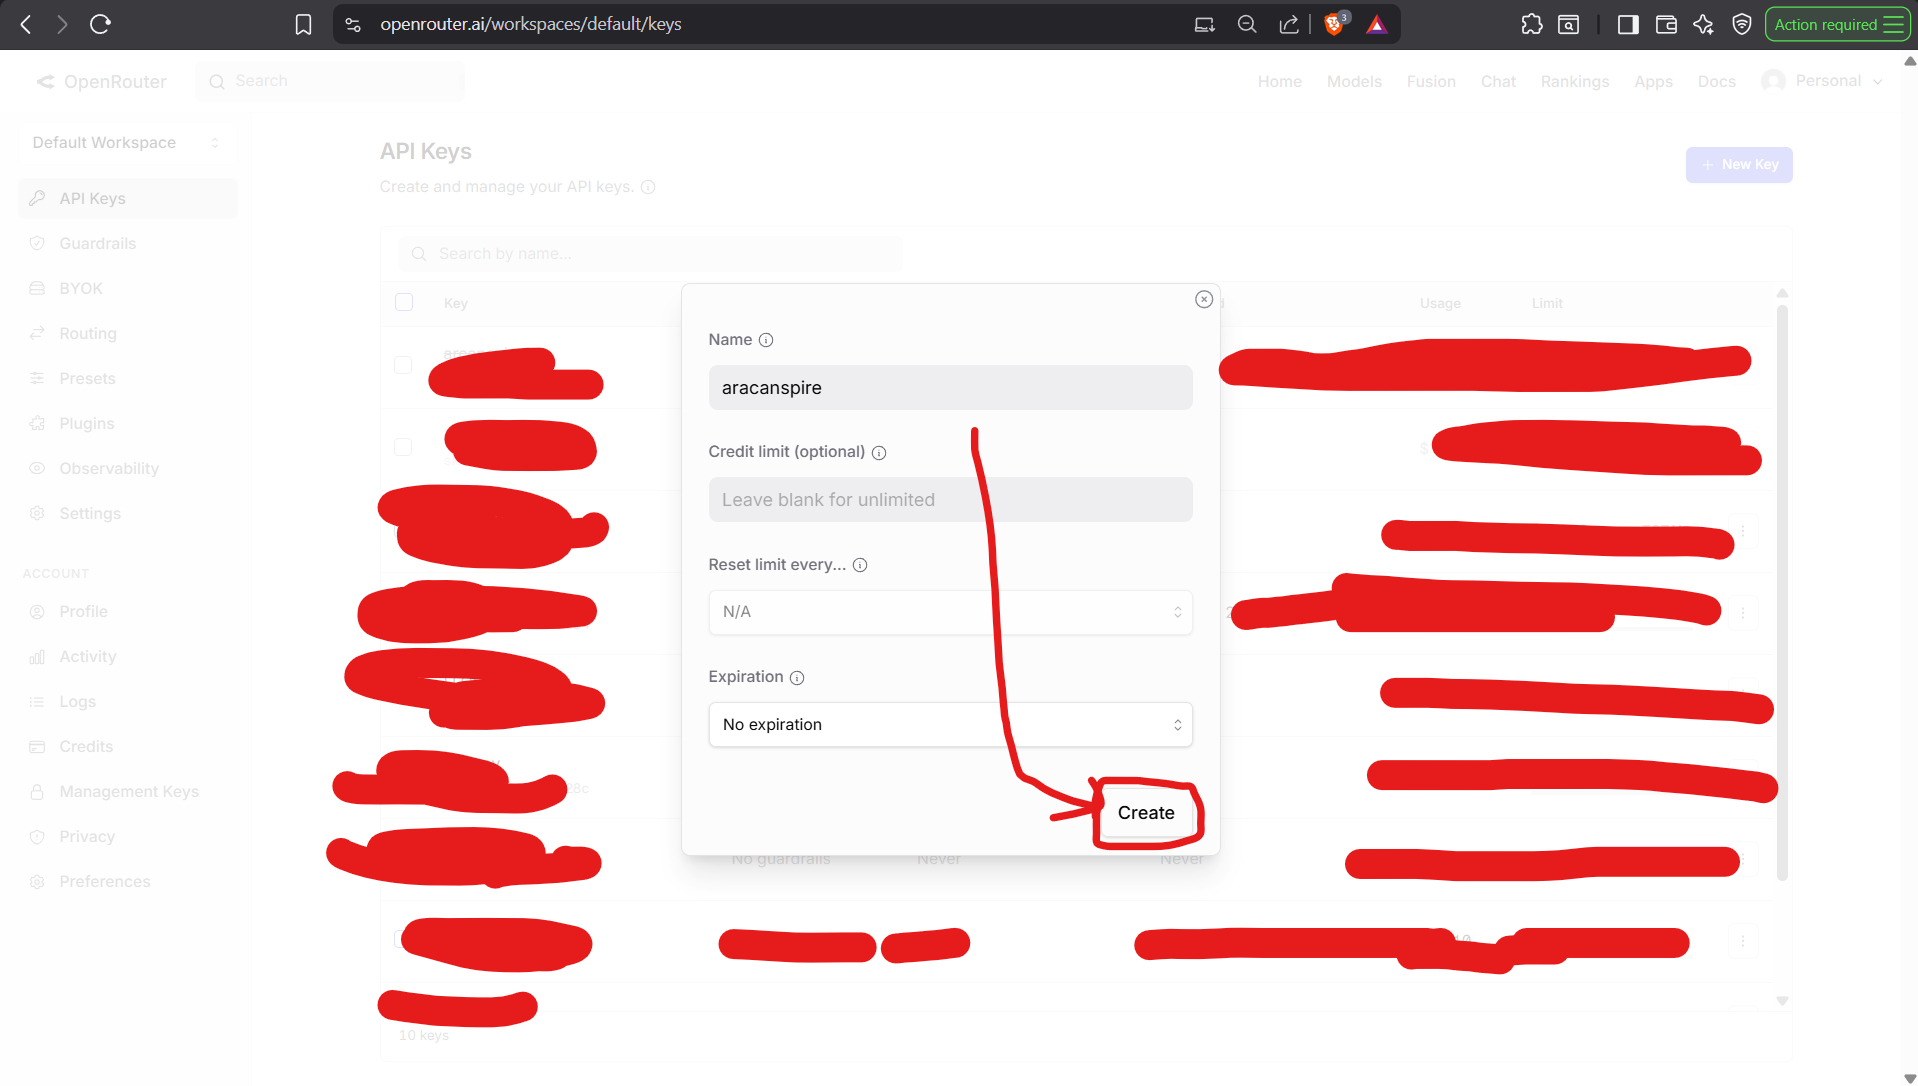
Step 4
On the OpenRouter keys page, fill in the new key form and create the key.

Step 5
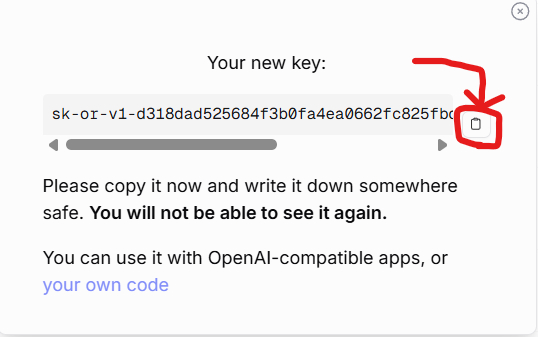
OpenRouter only reveals the full secret once, so copy it before closing the key dialog.

Step 6
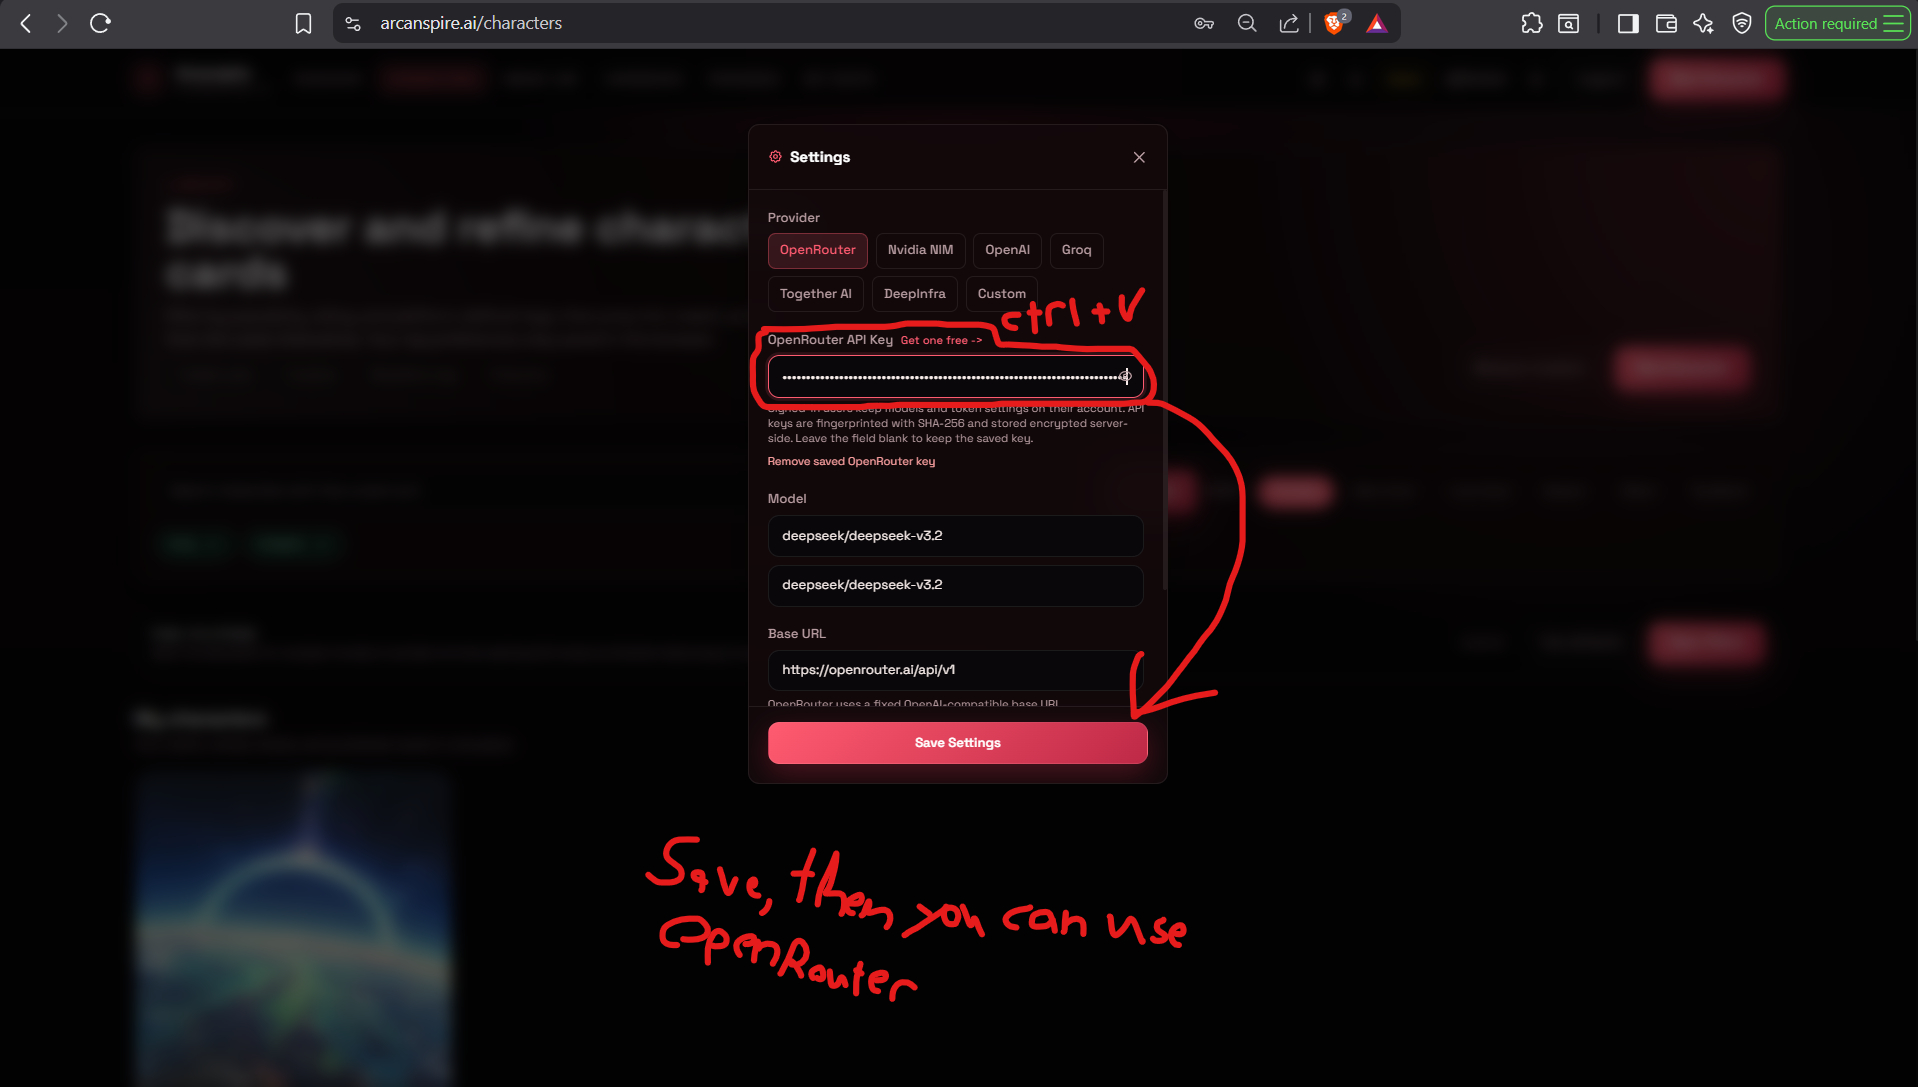
Return to Arcanspire and paste the copied key into the OpenRouter API key field, then save it.

Step 7
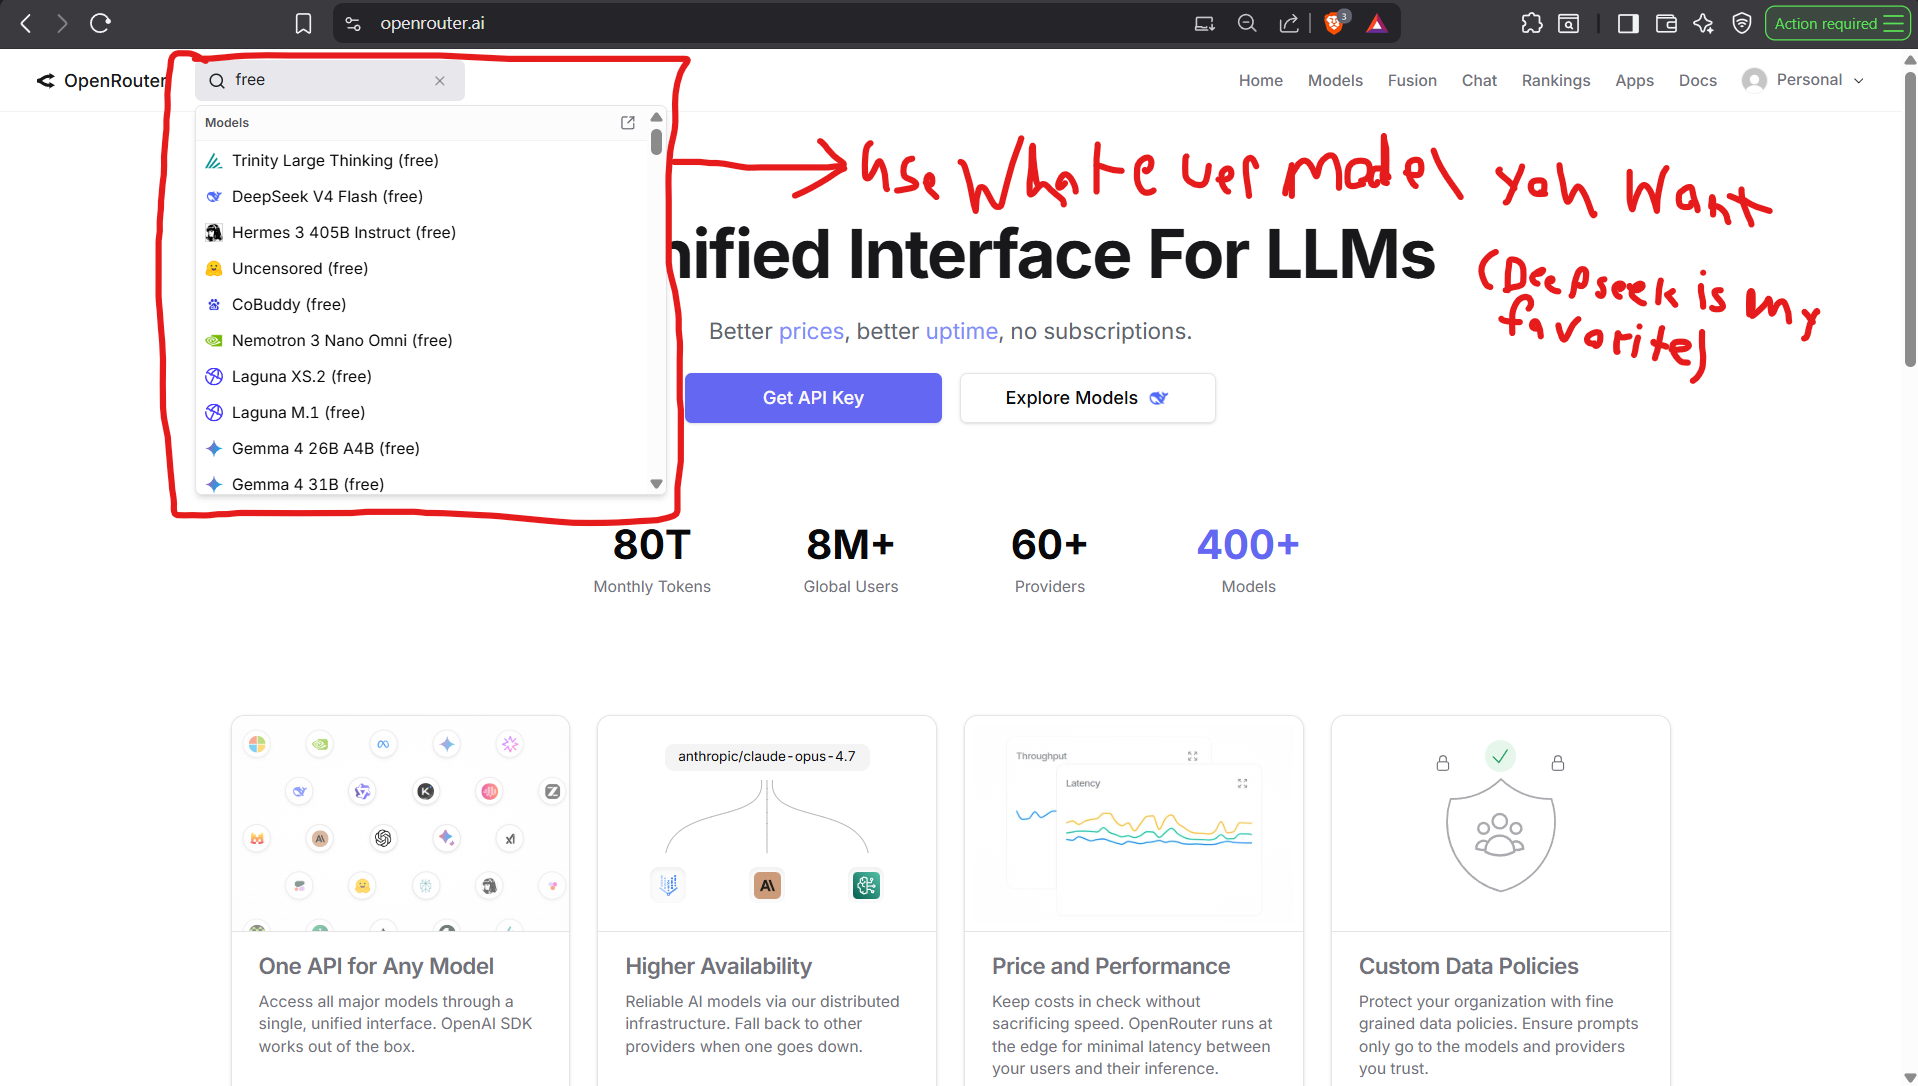
After the key is saved, go back to OpenRouter, search for free models, and pick the one you want.

Step 8
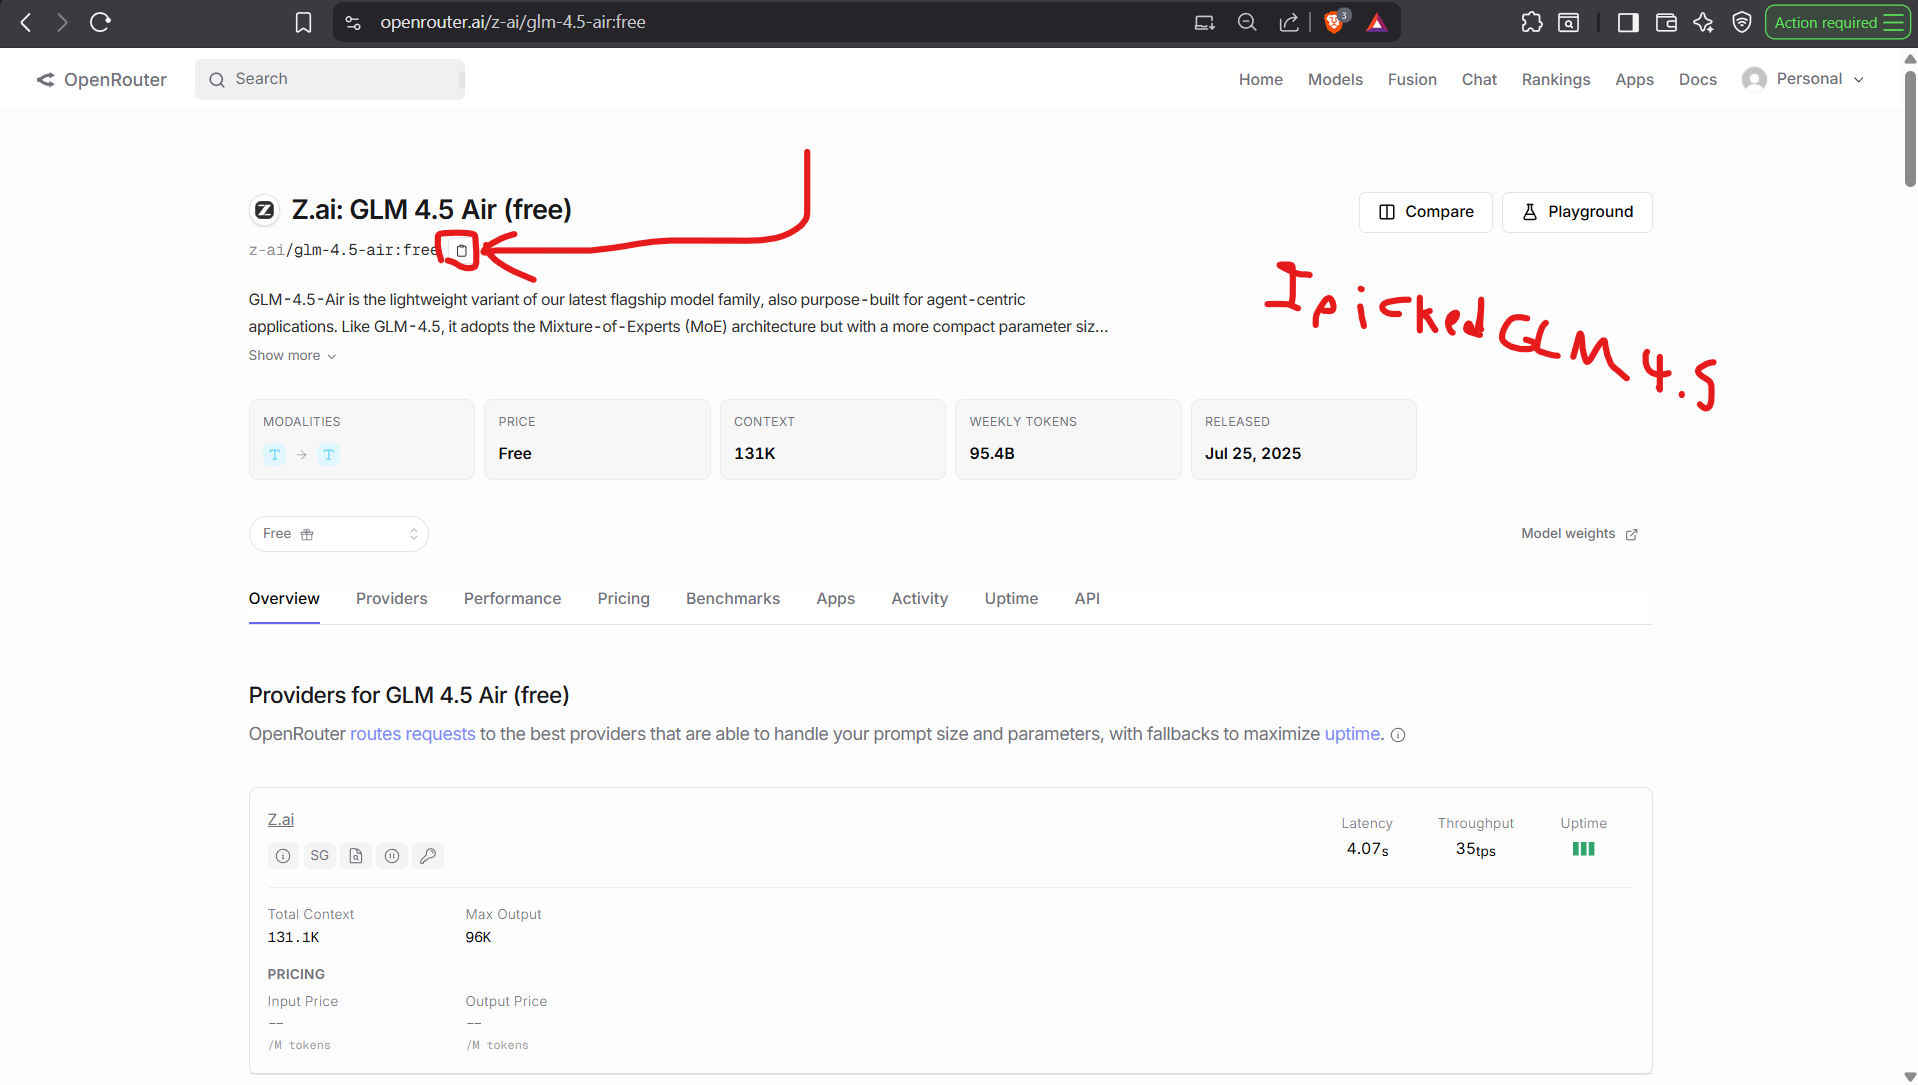
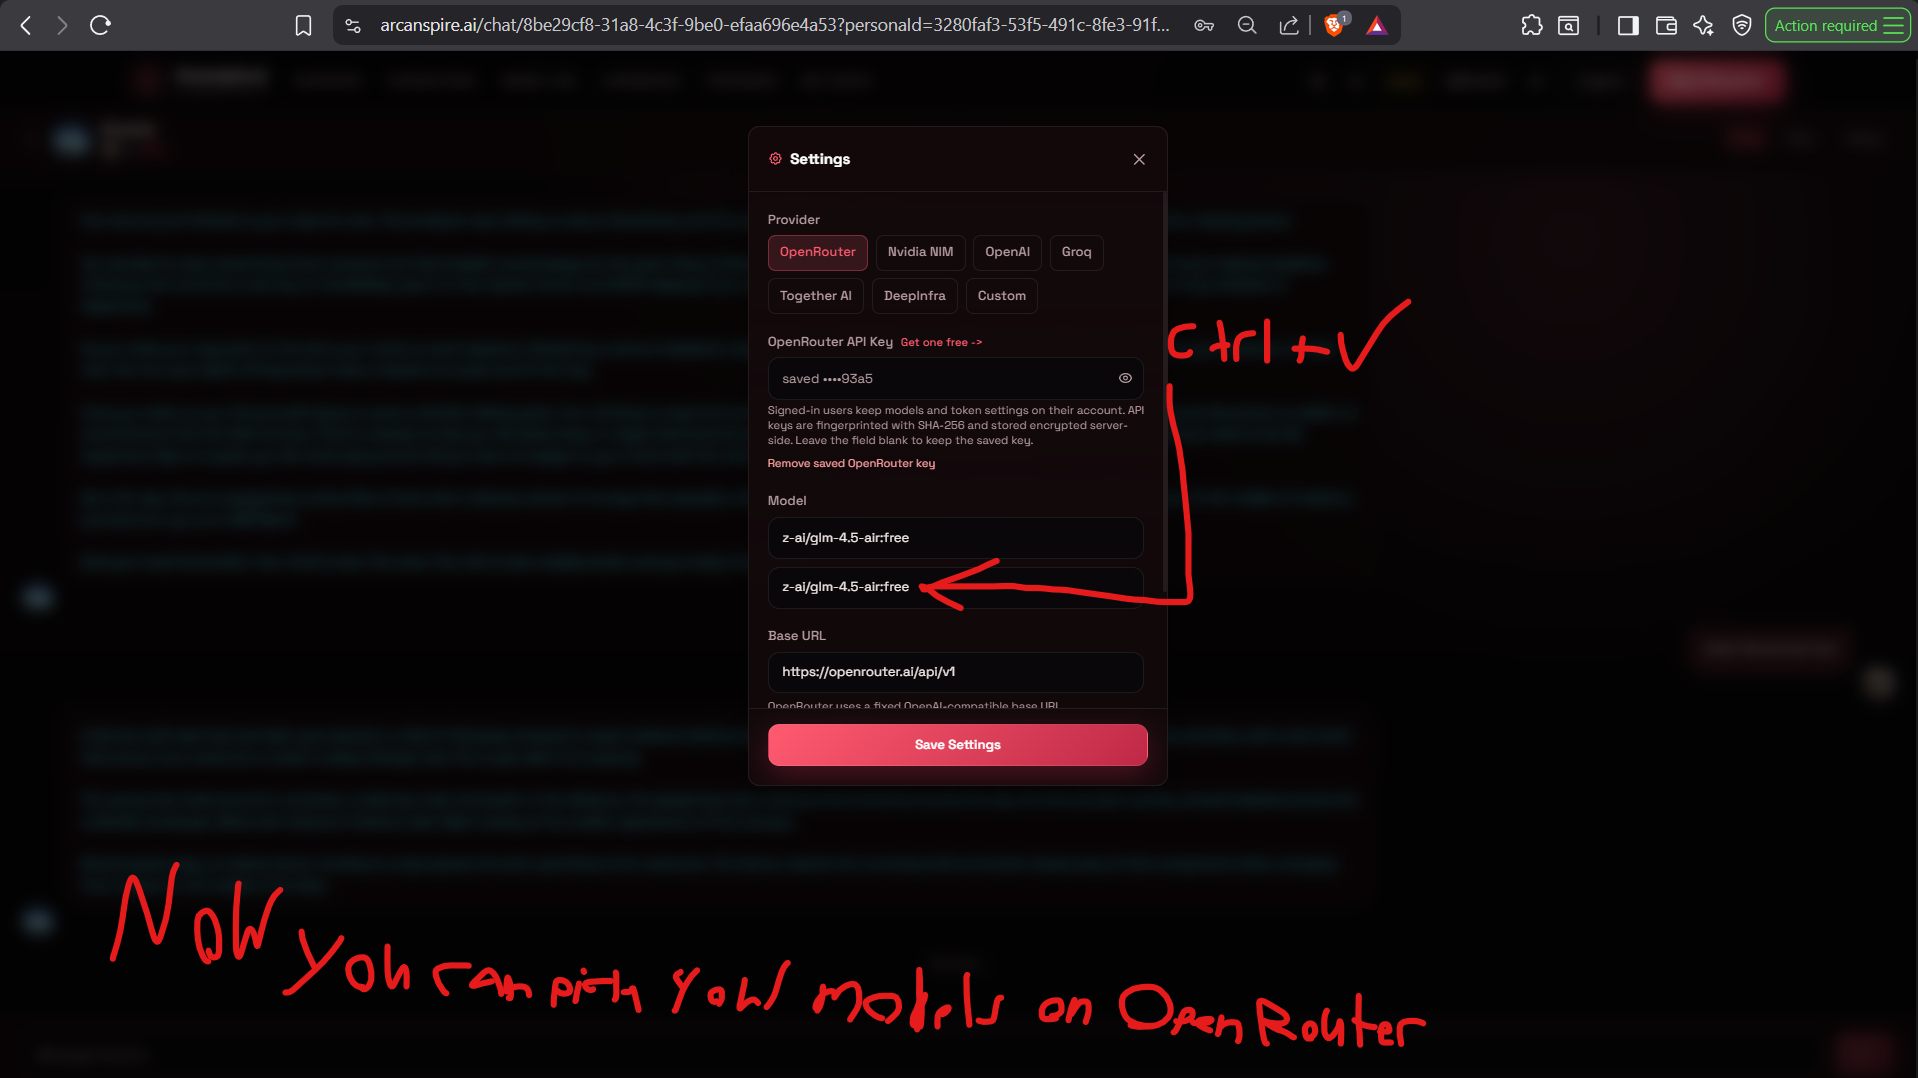
After choosing a free model, open its detail page and copy the exact model identifier shown there.

Step 9
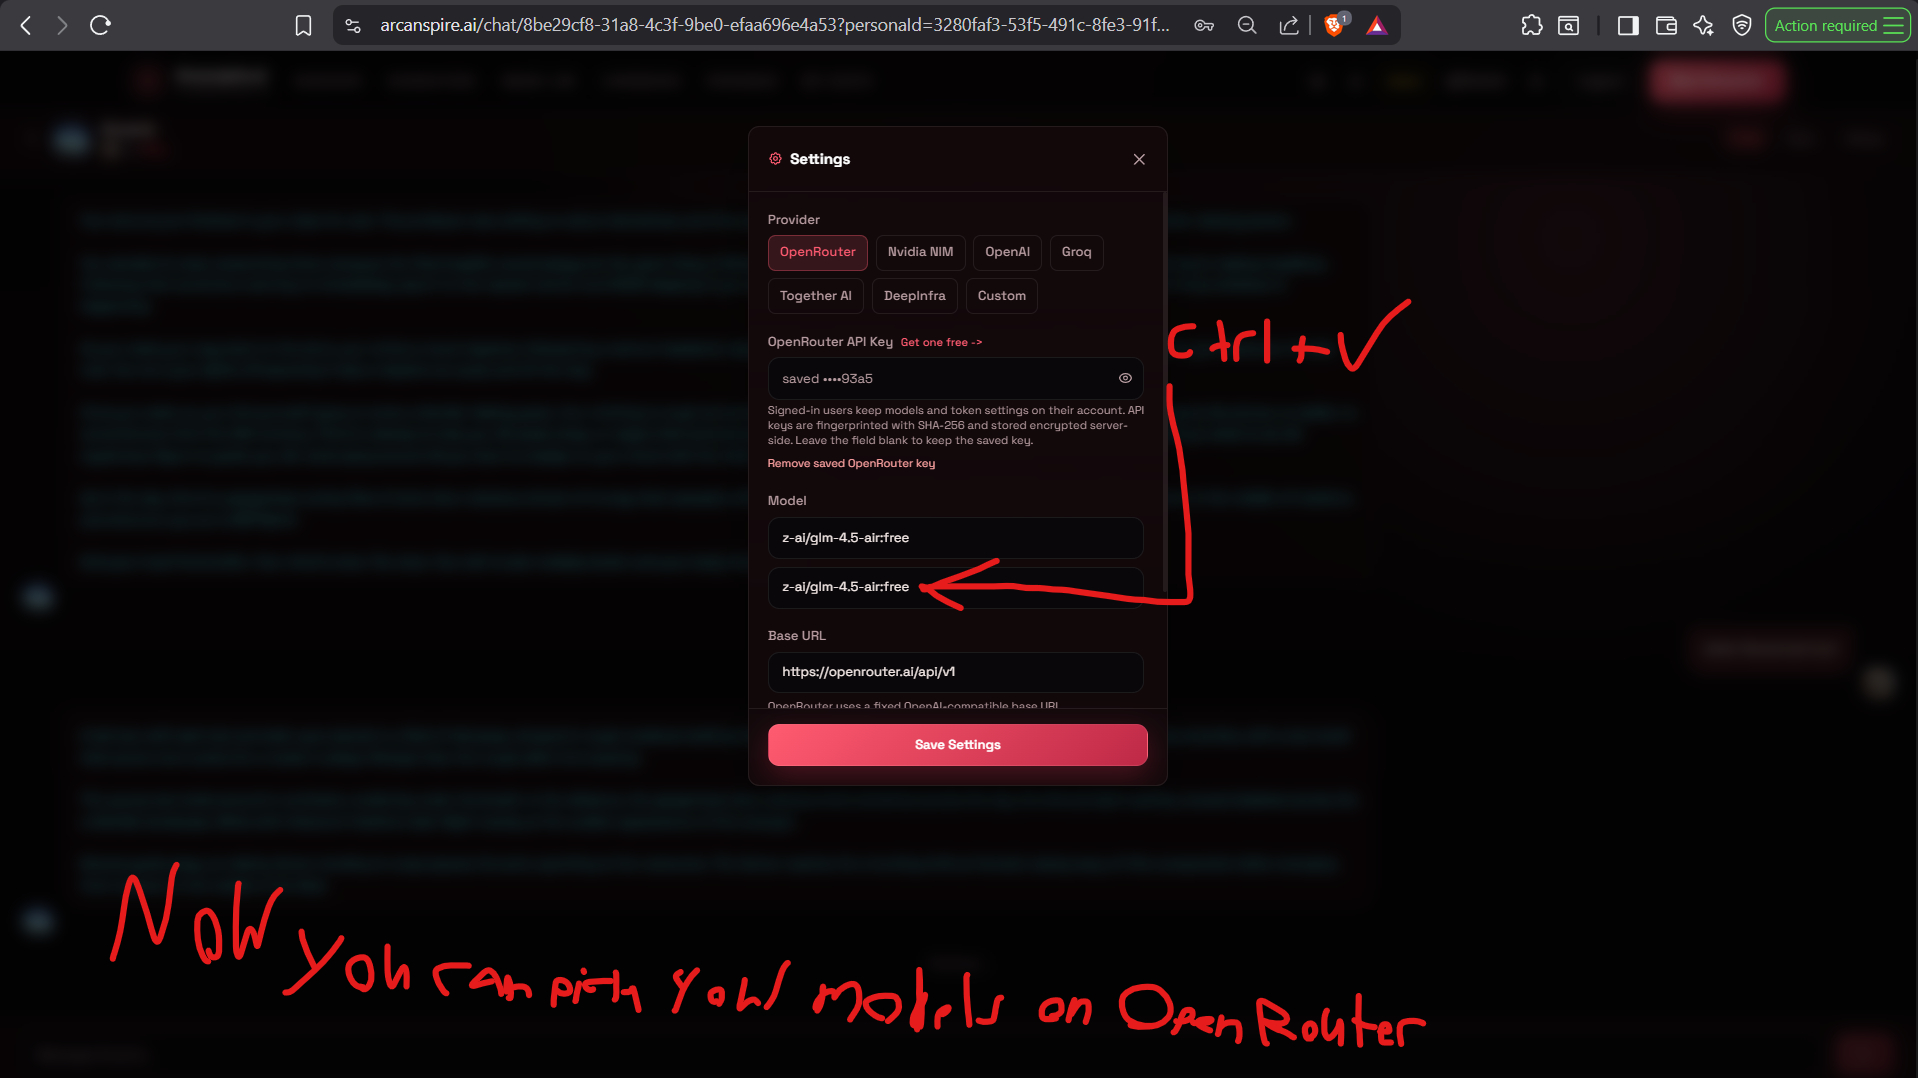
Return to Arcanspire, paste the copied model ID into the Model field, and save again to use the exact OpenRouter model you picked.

Extra OpenRouter References
The first repeats the same Get API Key landing page already shown in the main flow, and the second is another capture of the final custom-model save back inside Arcanspire.


Nvidia NIM Walkthrough
Step 1
The Nvidia walkthrough starts in the exact same place as OpenRouter: the Arcanspire settings modal.

Step 2
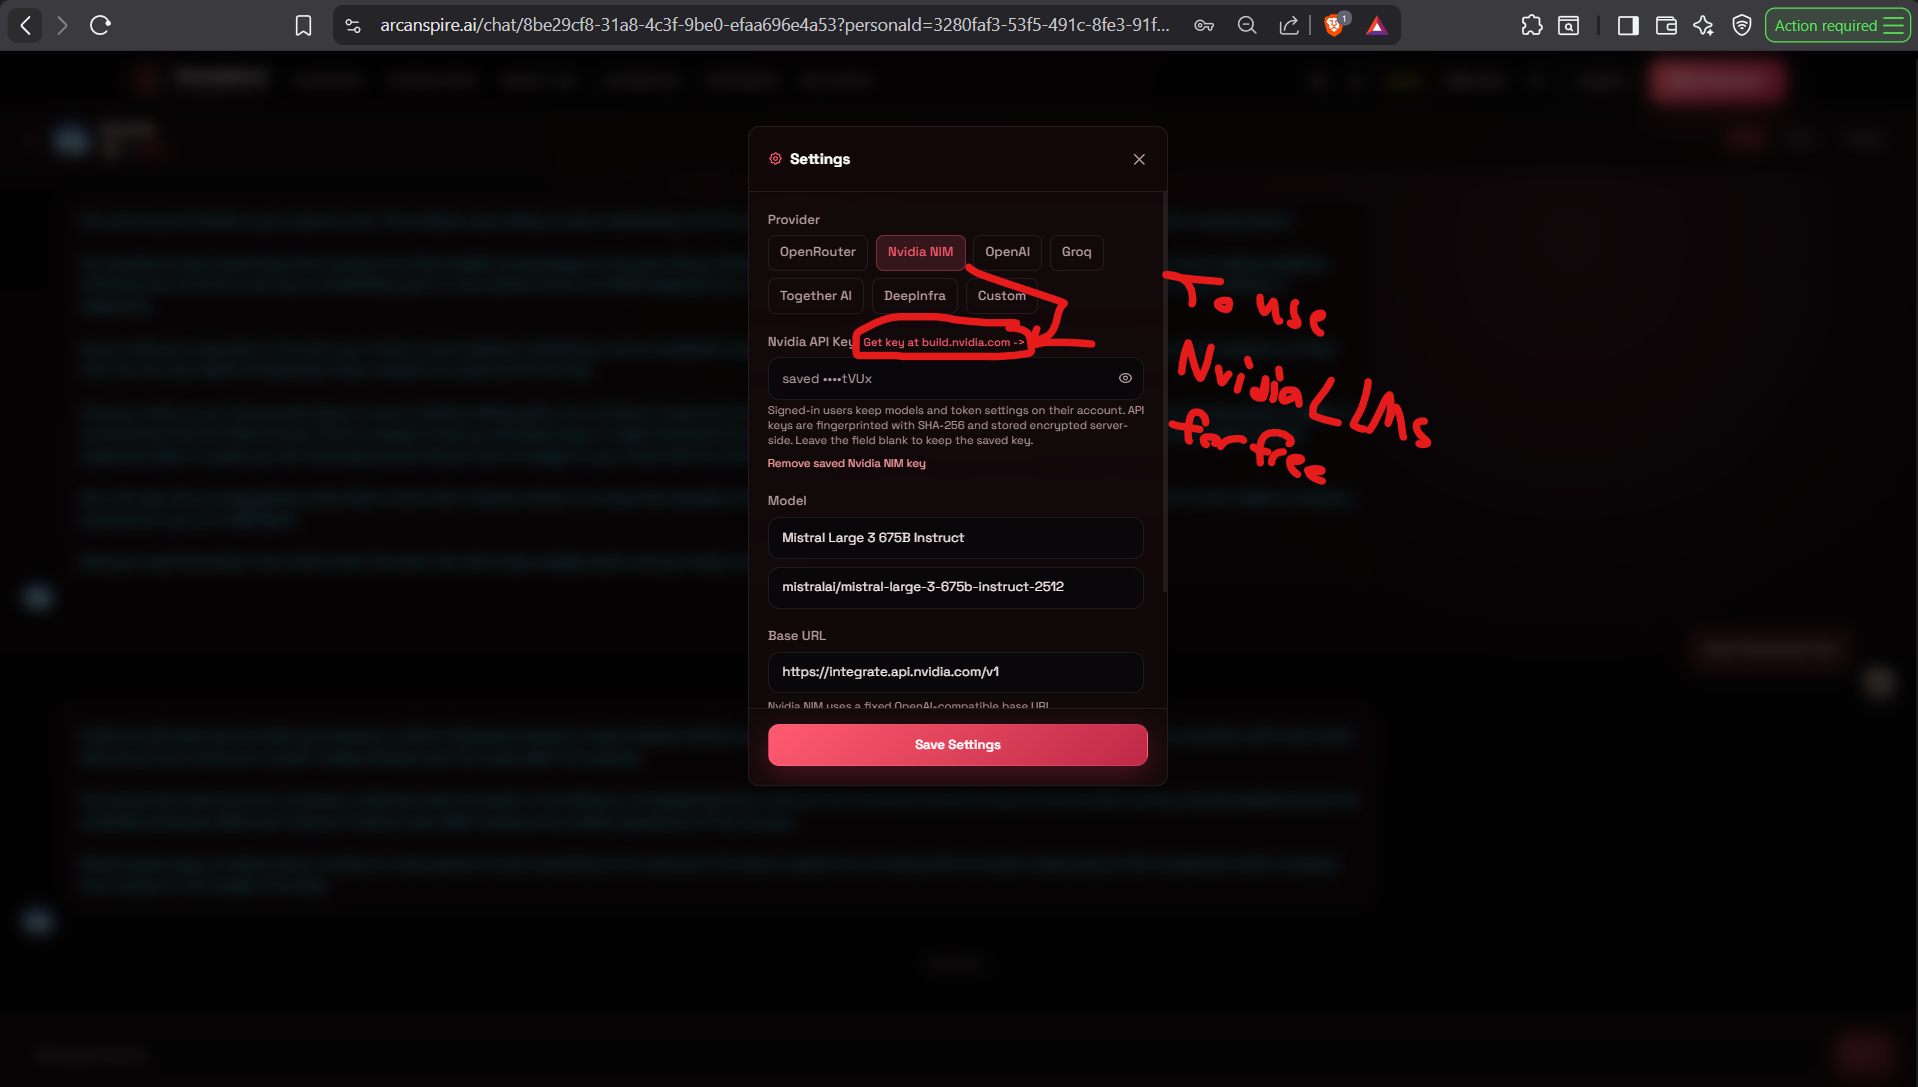
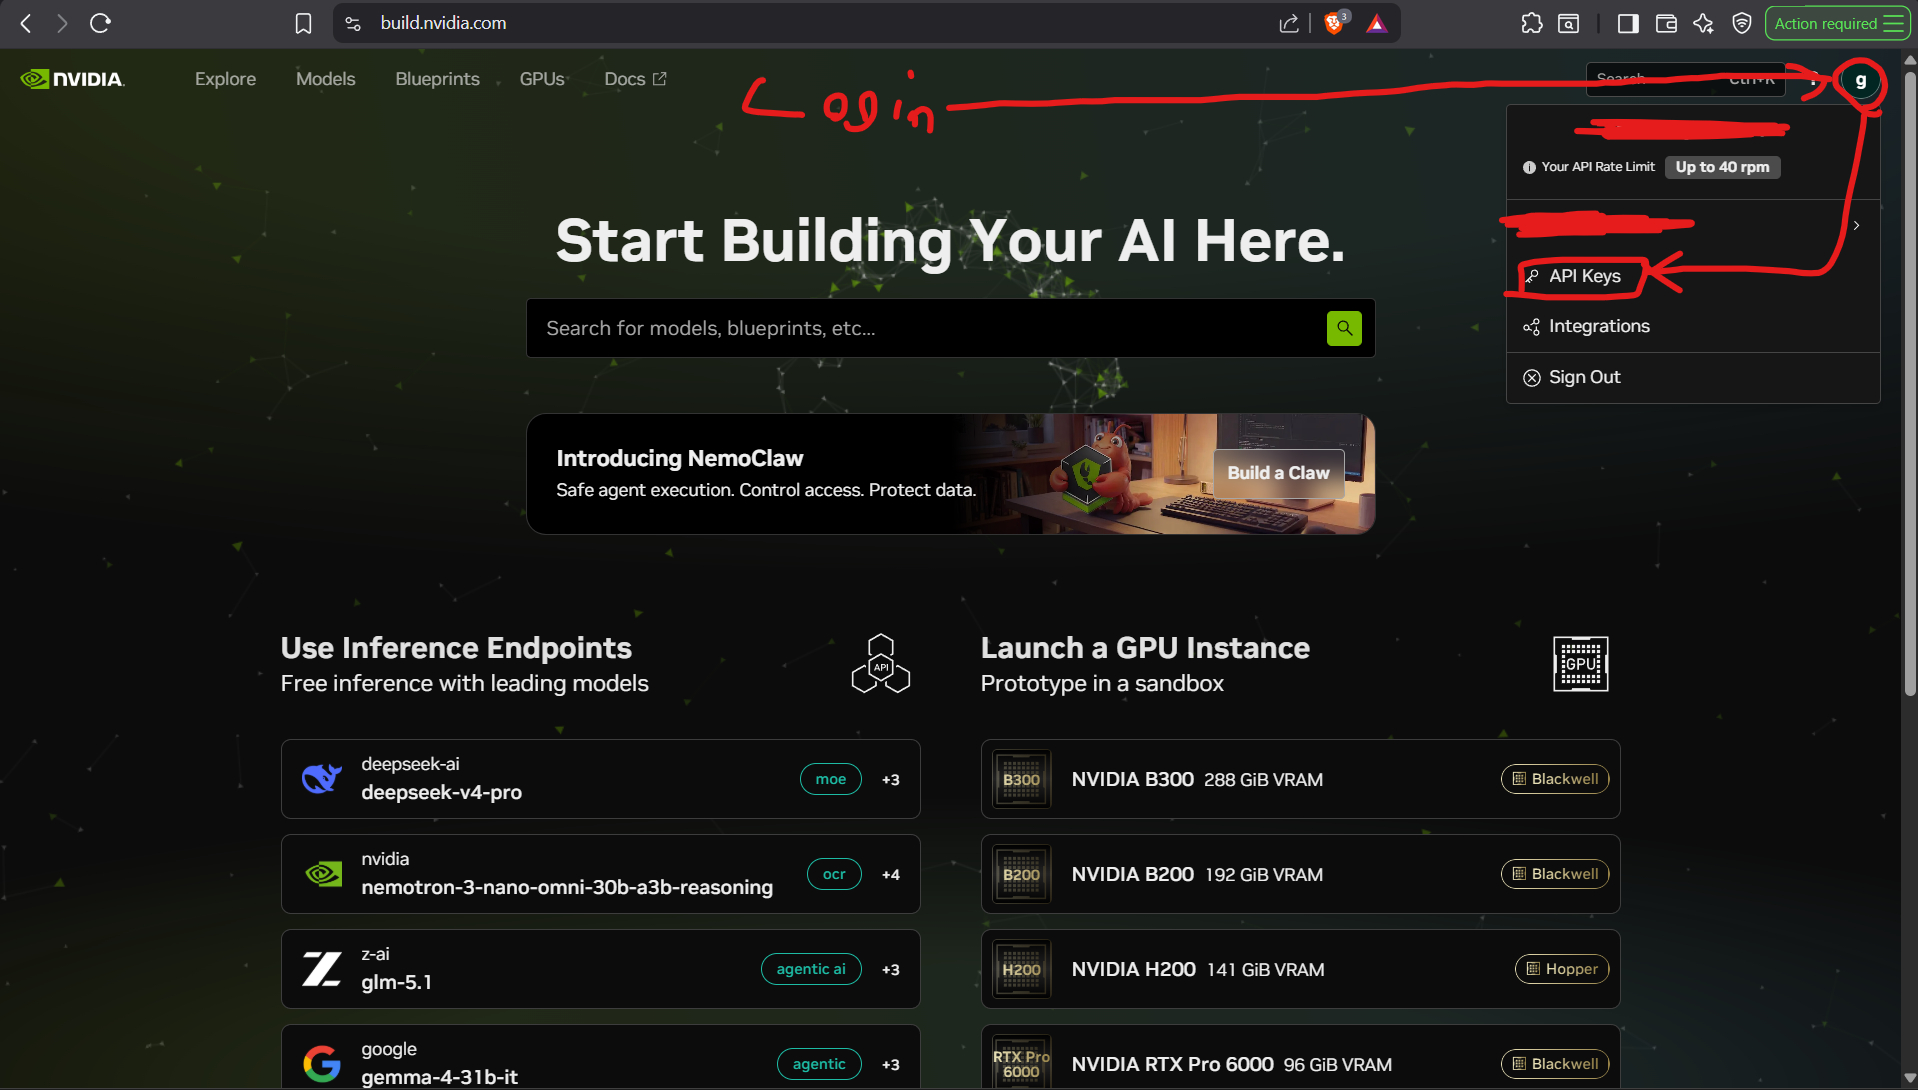
Use the provider link from the settings modal, sign in on Nvidia Build, open the profile menu, and enter the API Keys area.

Step 3
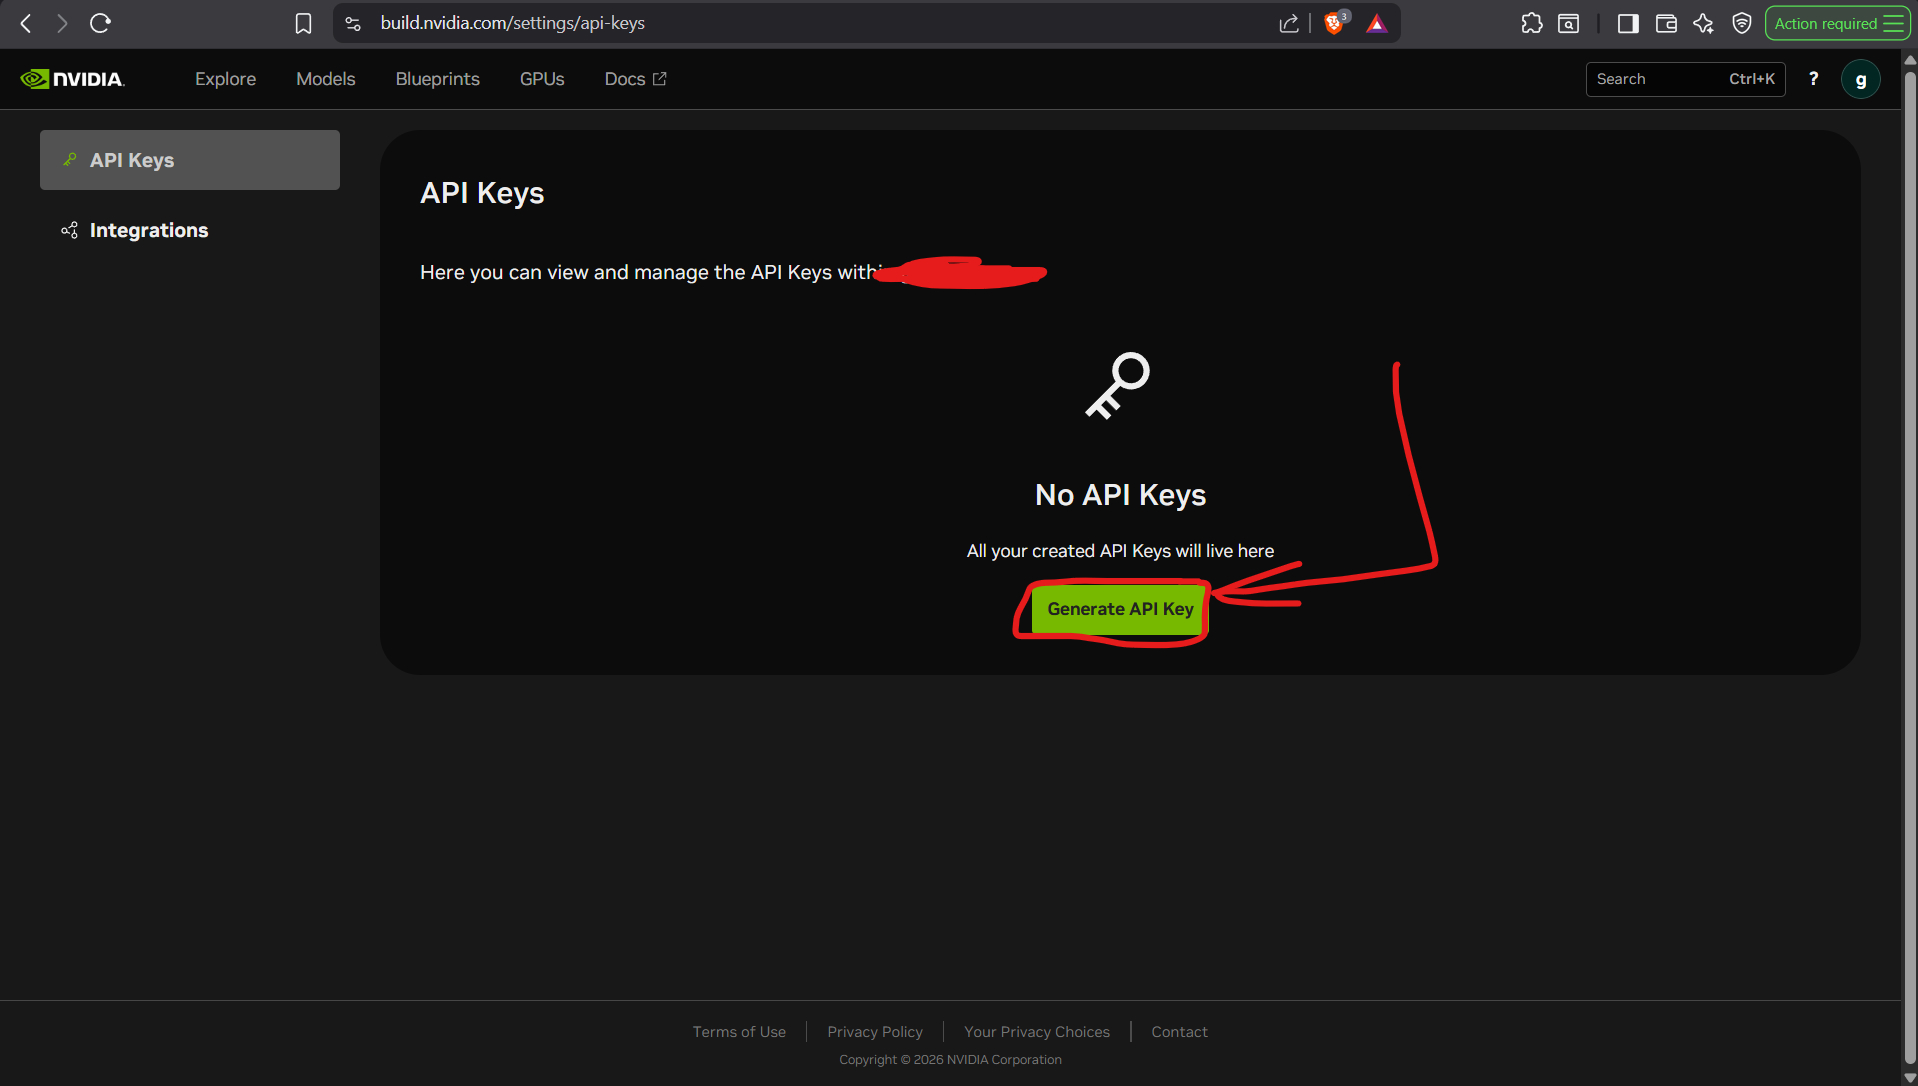
The empty API Keys screen on Nvidia Build gives the user a direct generate button when there are no existing keys.

Step 4
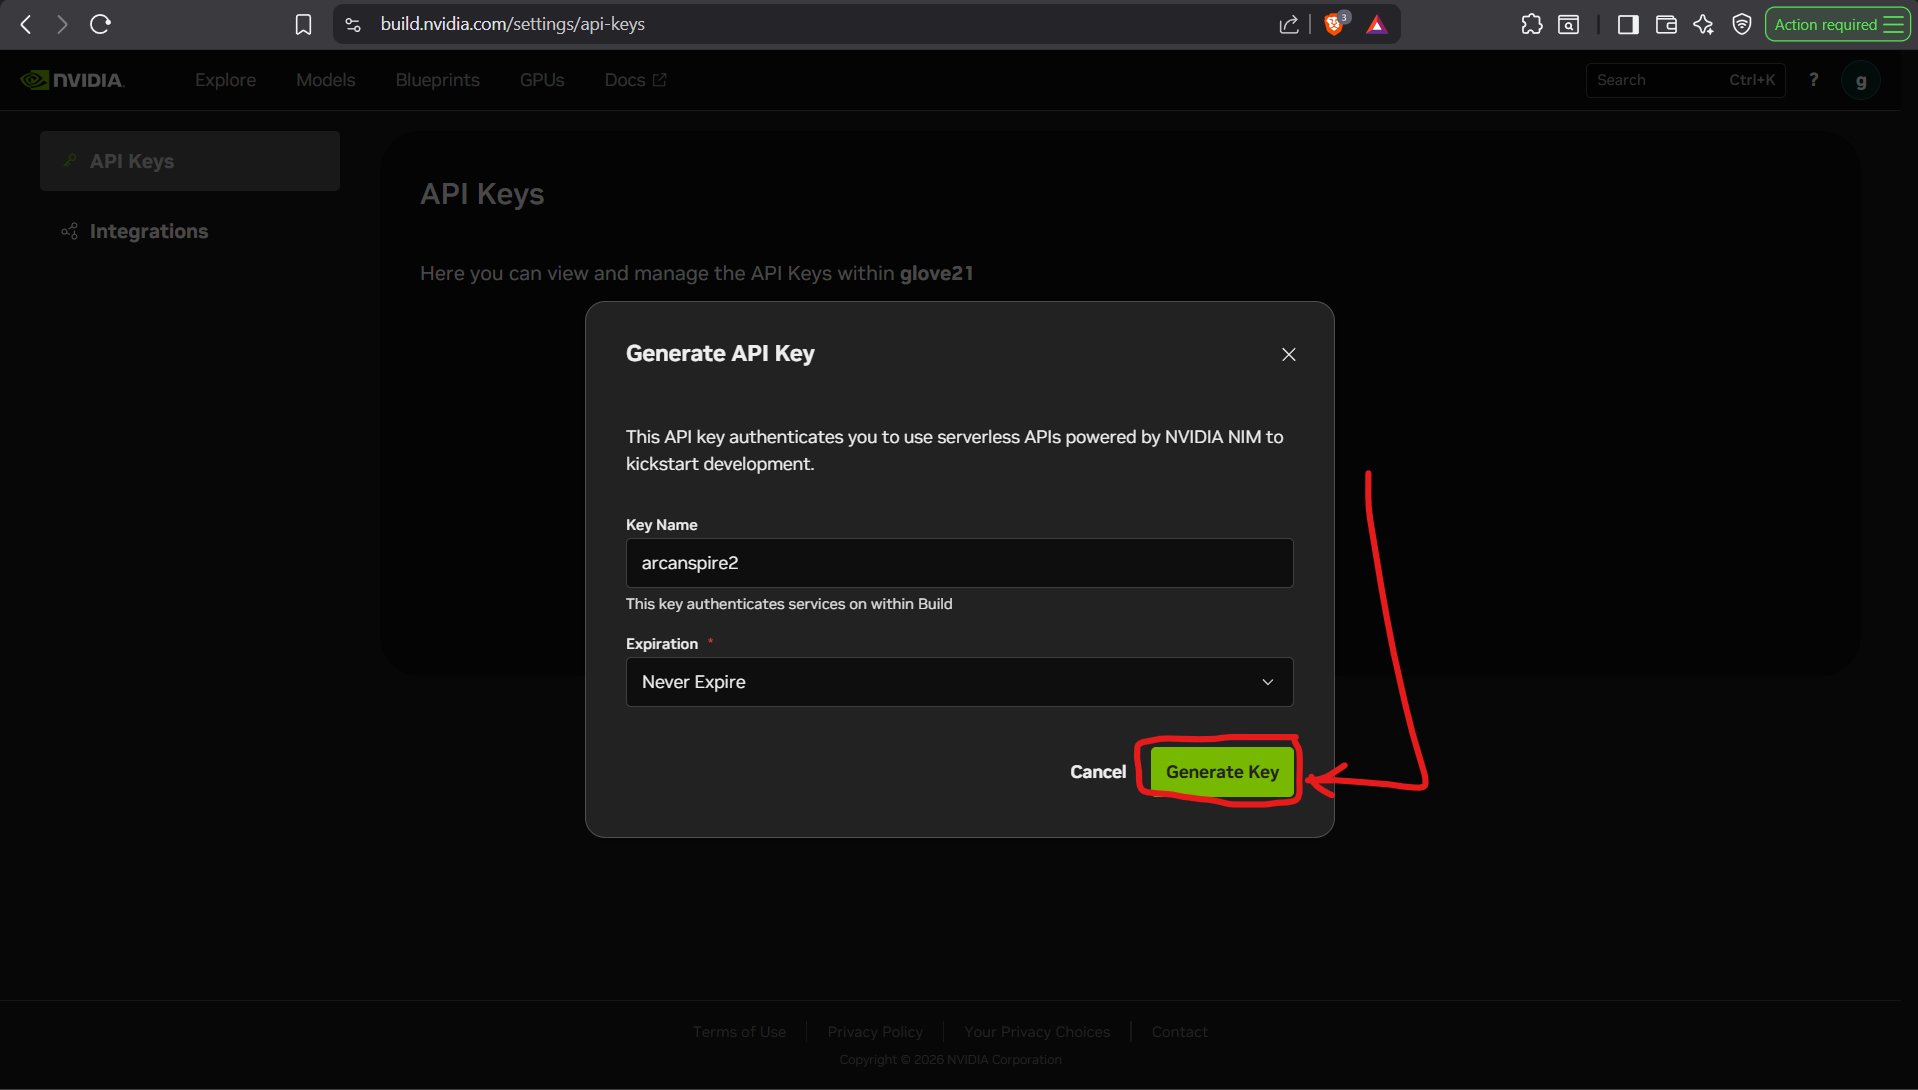
Give the key a clear label, keep the expiration the user wants, and then generate the key.

Step 5
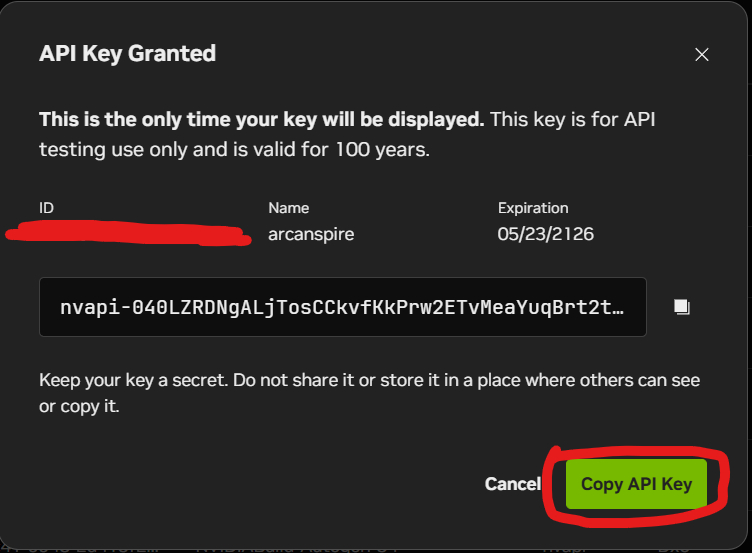
The success dialog is where Nvidia reveals the full secret. Copy it before leaving the modal.

Step 6
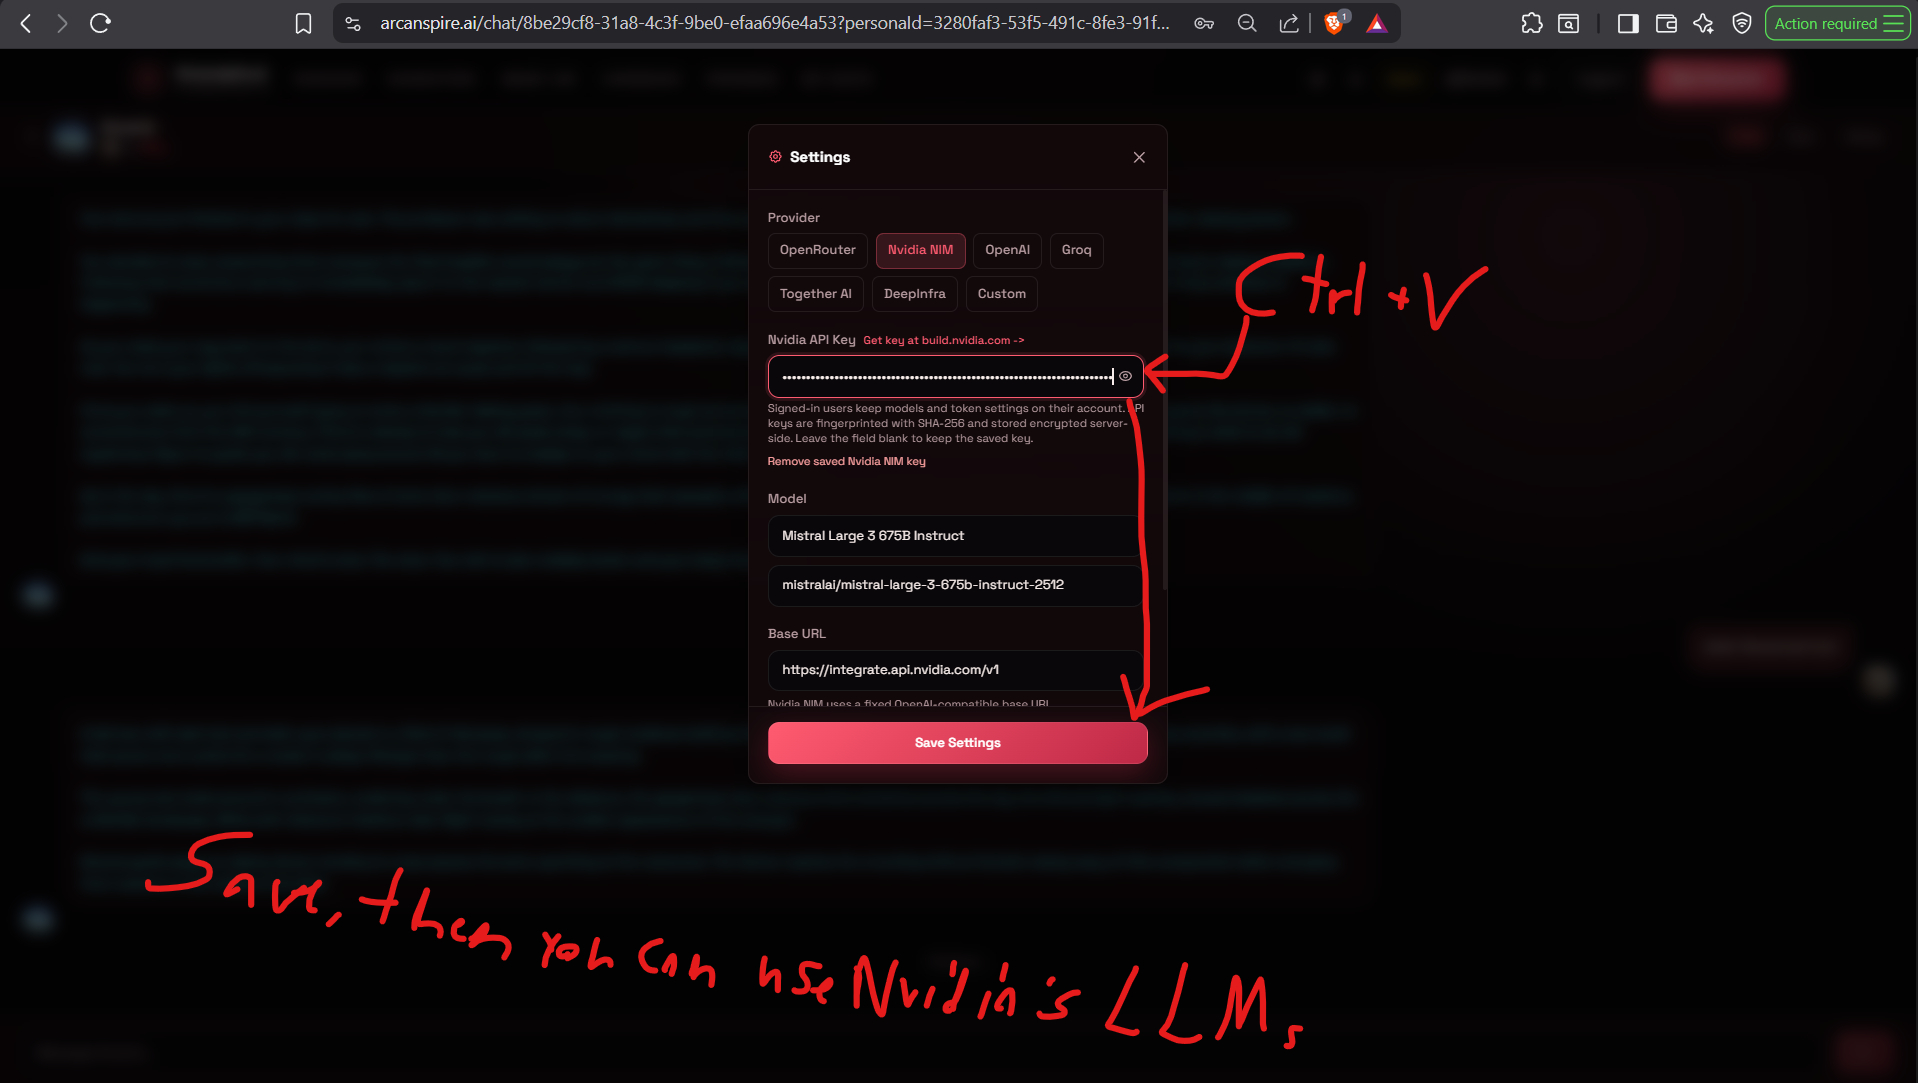
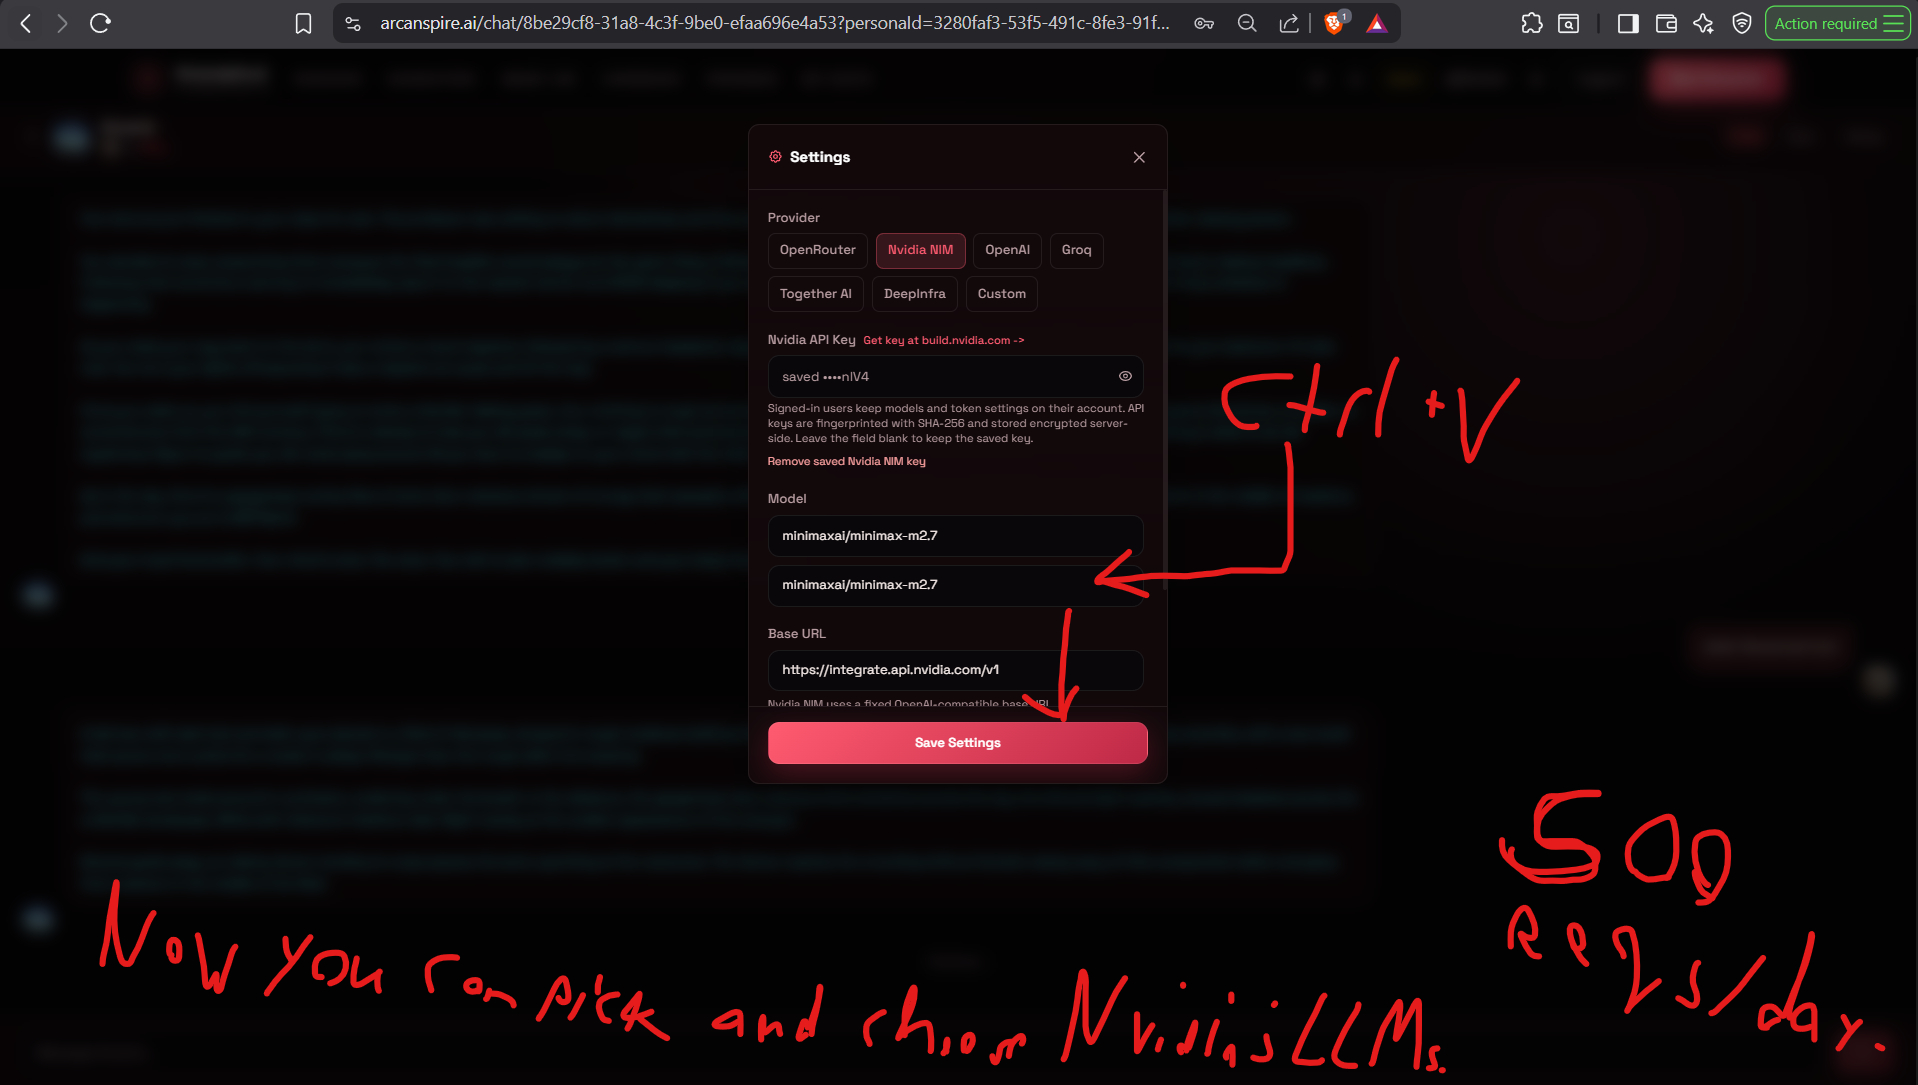
Return to Arcanspire, paste the copied Nvidia key into the API key field, and save the provider using the model already shown there.

Step 7
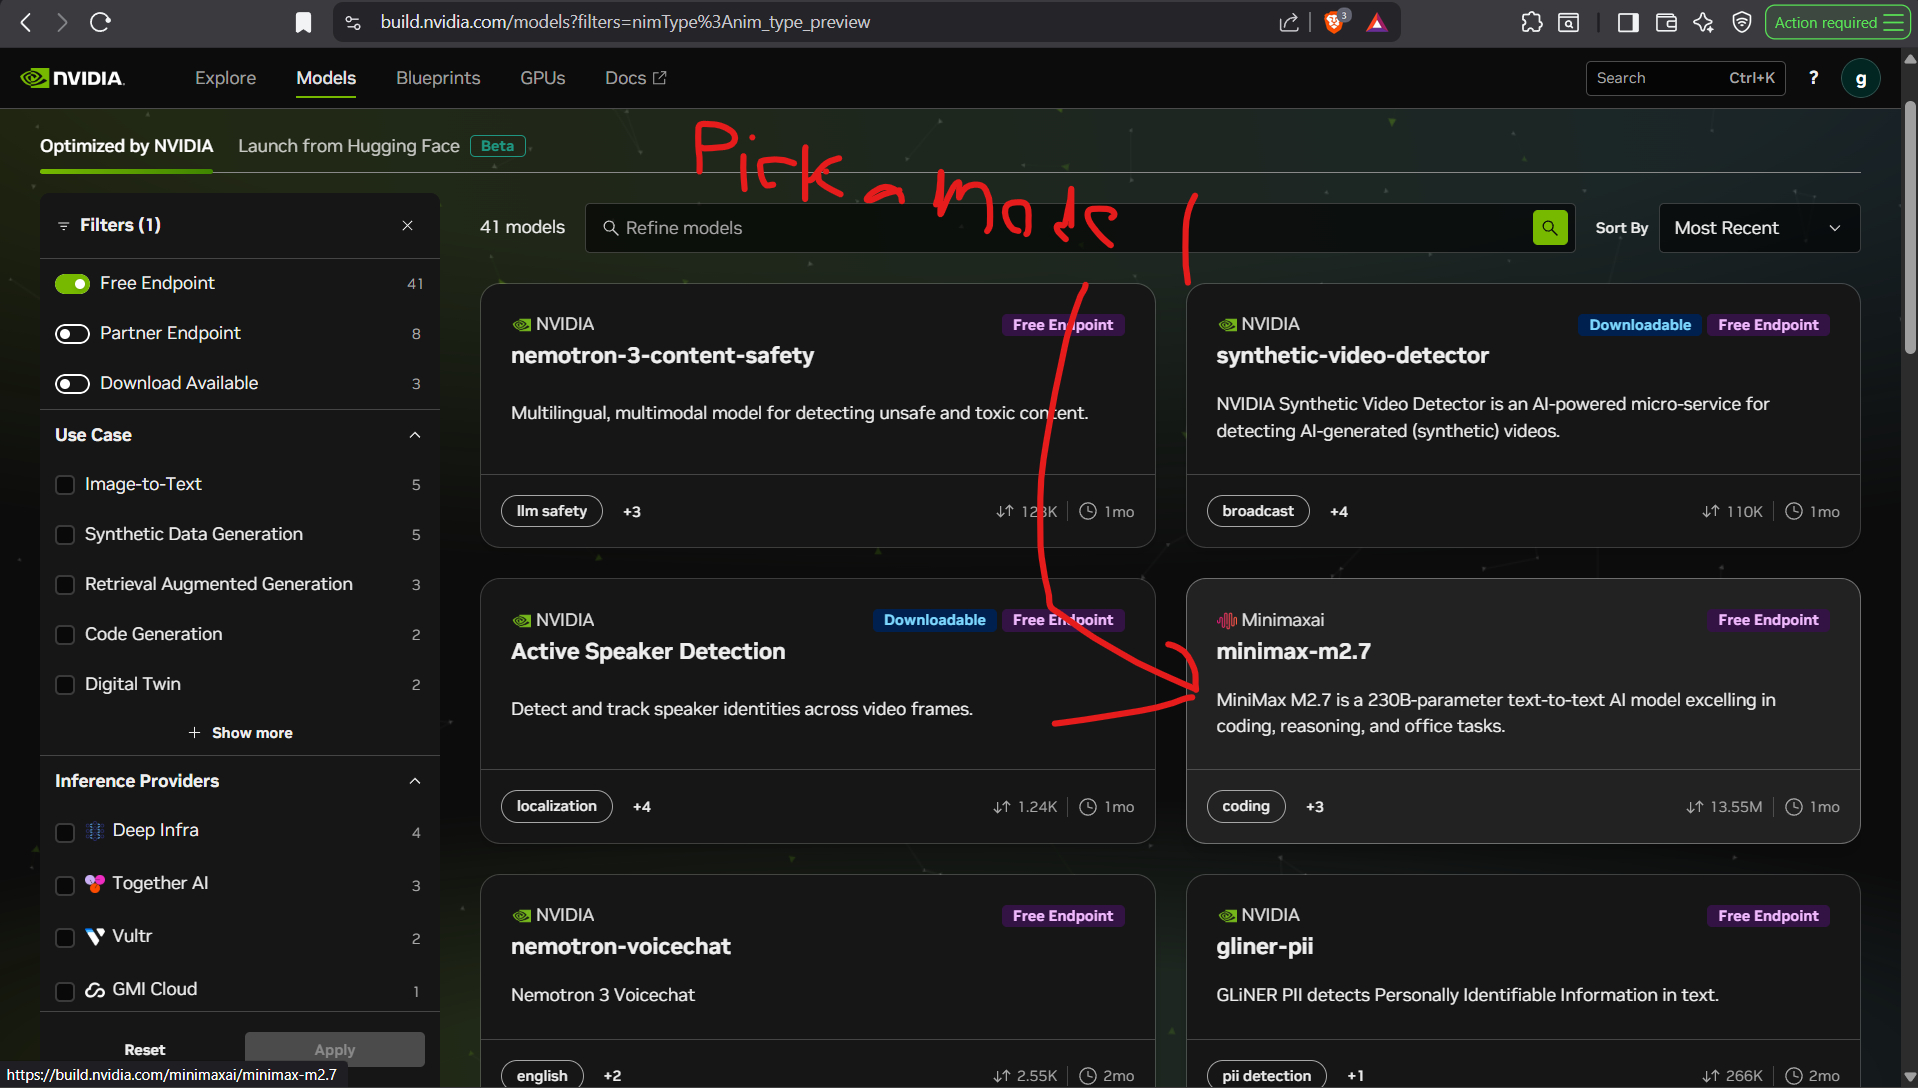
Browse Nvidia models and filter for free endpoint availability before choosing one.

Step 8
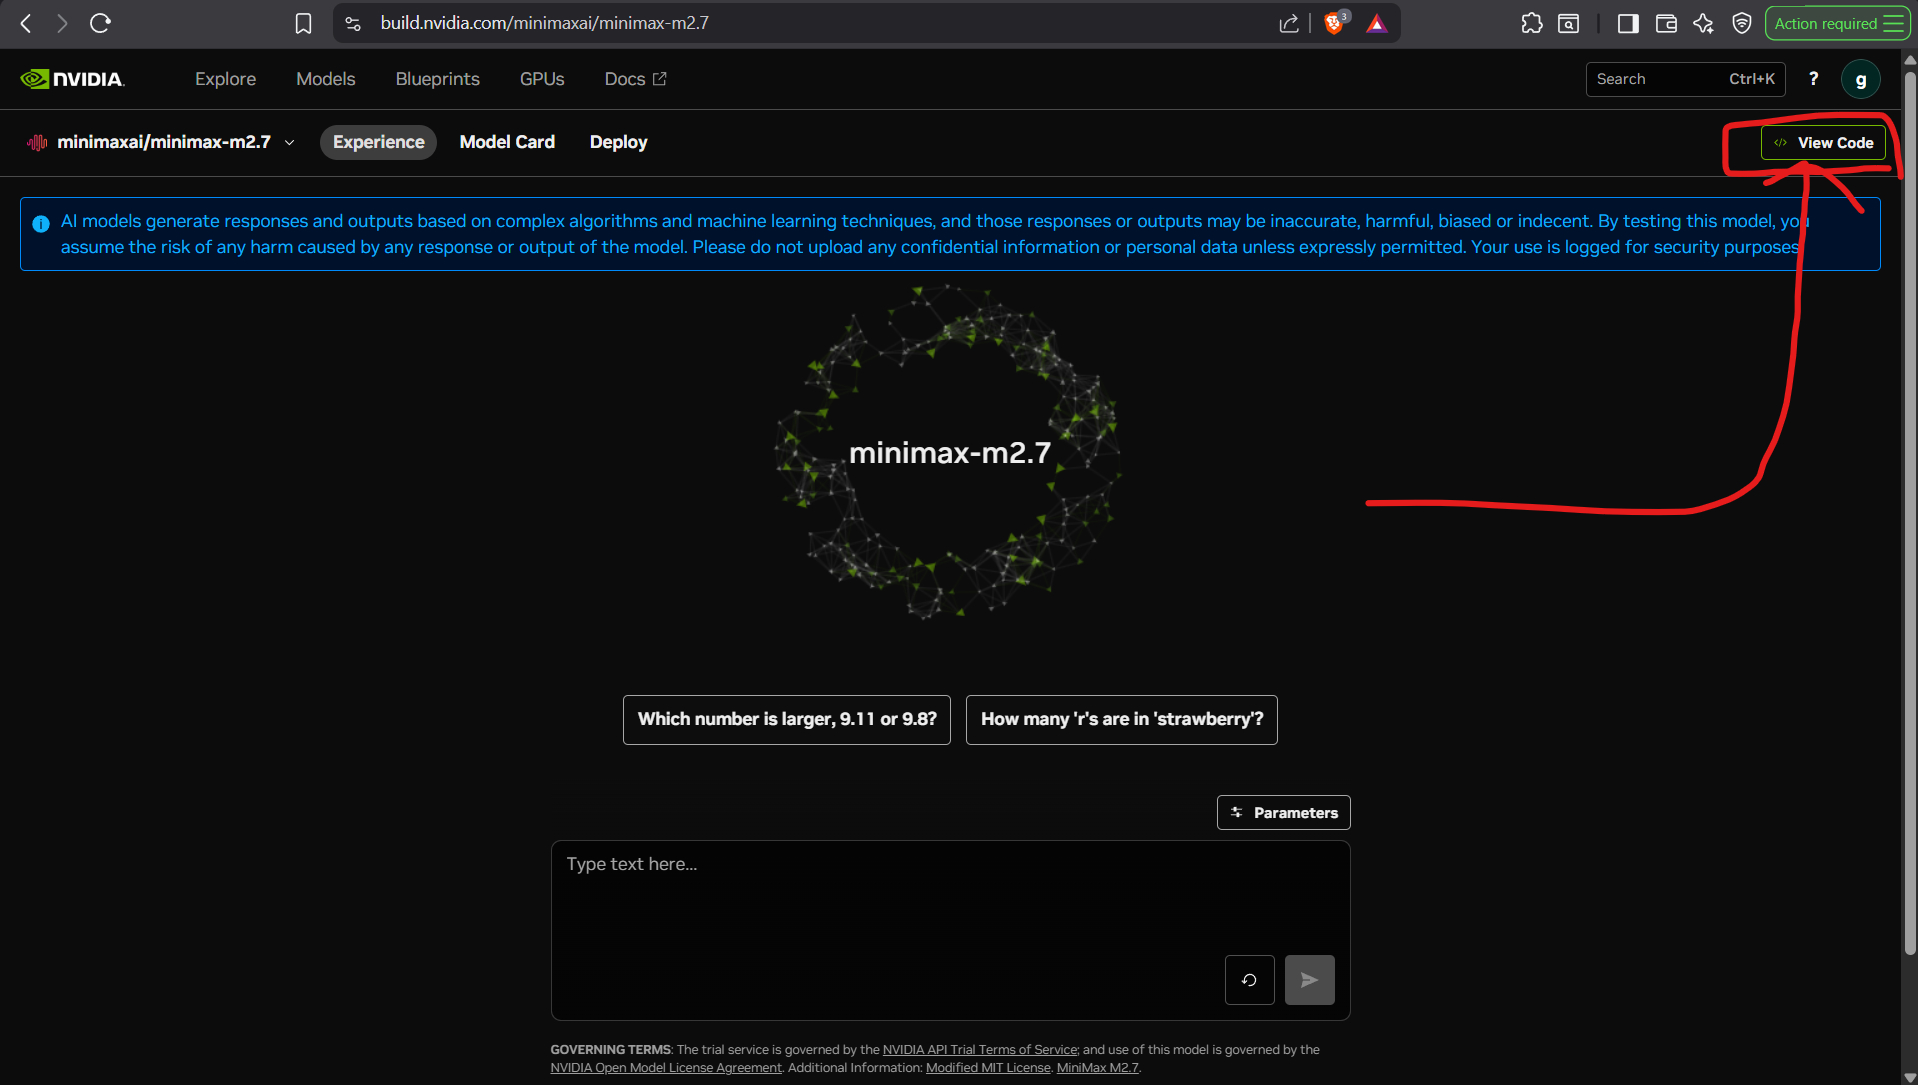
After picking a free-endpoint model, open its page and bring up the code example.

Step 9
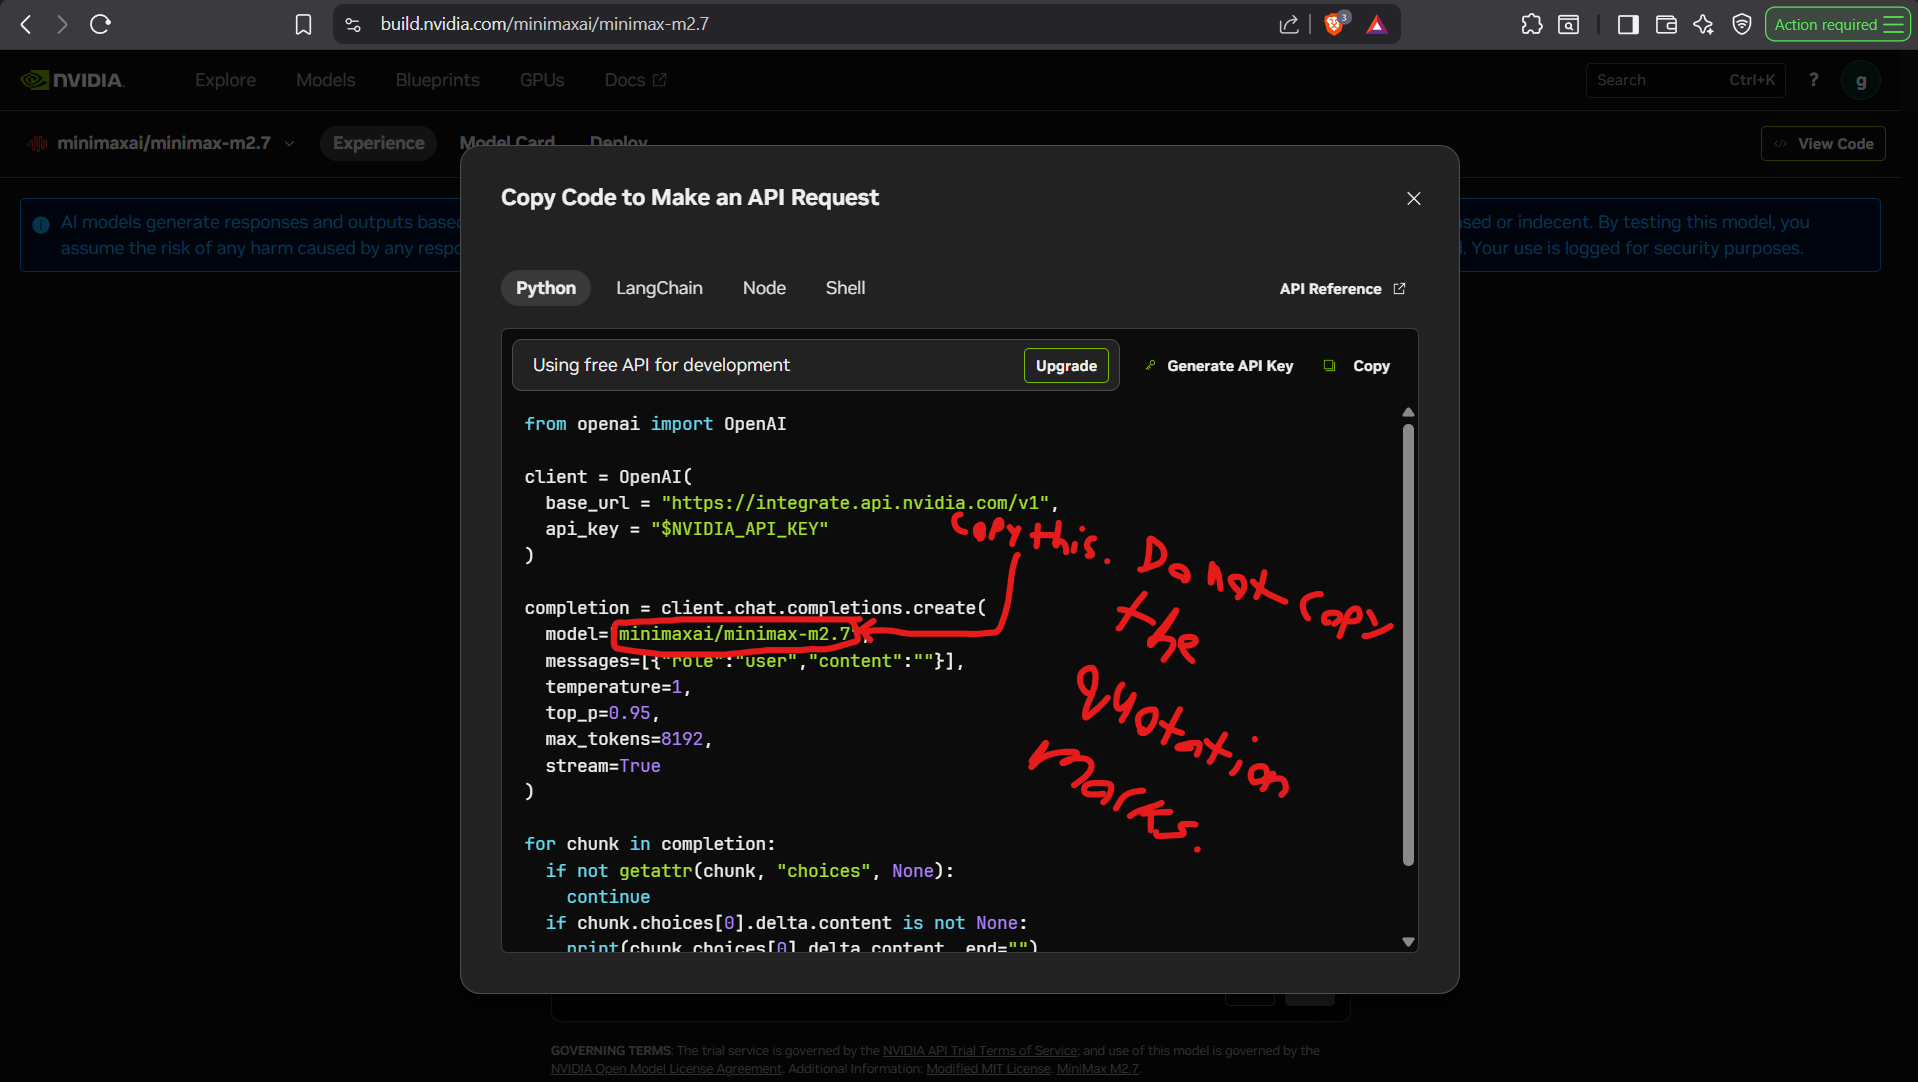
Inside the View Code dialog, copy only the model identifier itself. Do not include any quote marks around it.

Step 10
After copying the model ID from View Code, return to Arcanspire, paste it into the Model field, and save again.

Common mistakes
Wrong model name
Use the exact identifier shown on OpenRouter or inside Nvidia's View Code example.
Key copied too late
Some providers only show the full secret once. Copy it immediately during creation.
Saved the wrong provider tab
Make sure the provider tab matches the key you just created before you press Save Settings.
Done?
After the key and model are saved, Arcanspire will use that provider on the next chat request. If a user wants to switch later, they can reopen the same settings gear and replace the saved values.
Cookie consent
Arcanspire starts without cookies. Public browsing works fine without them, but signing in, registering, and other account-only features need one essential session cookie to keep you authenticated. Read the cookie policy for more details.